 Get my Cookbooks!
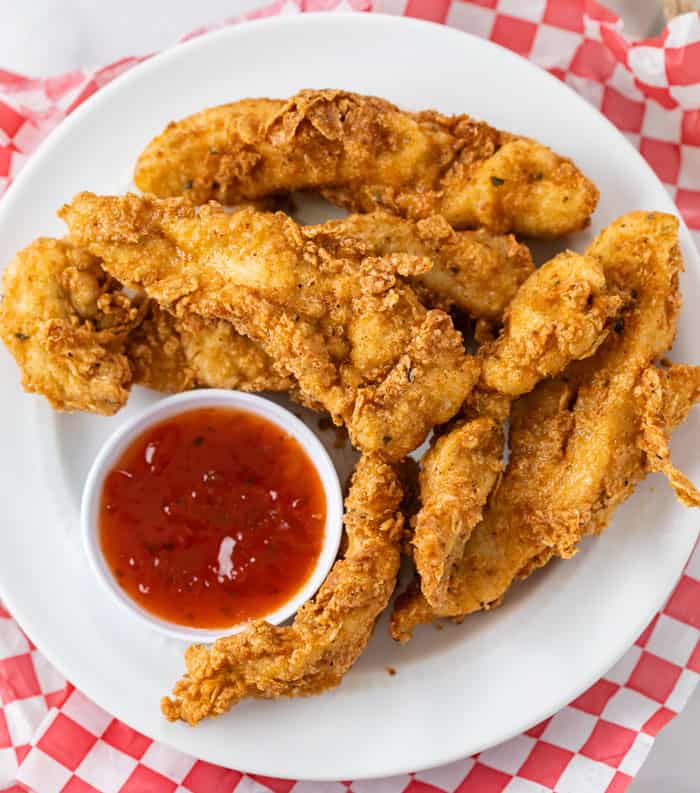
 Fried Chicken Tenders – EXTRA CRISPY

These EXTRA CRISPY Fried Chicken Tenders are easy to make at home and every bit as delicious as your favorite restaurant. Learn the secrets that the chefs use for making golden, perfectly seasoned, crunchy batter!
Be sure to serve these with my easy honey mustard sauce and homemade french fries!
Fried Chicken Tenders
If there’s one thing I know how to do, it’s how to fry up a batch of golden brown CRISPY chicken!
No need to run out and stock up on buttermilk, you can make these with exactly what you have on hand at home right now. Let’s get into everything you need to know!
How to Make EXTRA CRISPY Fried Chicken Tenders
Use a Dry Brine Method – NO Buttermilk!
To dry brine chicken means to salt it and let it sit uncovered in the fridge for several hours. This accomplishes 4 things:
- It allows the salt to penetrate through the chicken which gives it plenty of flavor.
- It also makes it extra juicy on the inside as the salt extracts the moisture which is then reabsorbed by the chicken.
- The salt also breaks down the tough muscle proteins, which makes the meat more tender.
- It keeps the outside of the chicken dry which allows it to grip all of the breading and make it extra crispy.
I choose to dry brine the chicken instead of soaking it in buttermilk, (which is a common alternative method for fried chicken), simply because I sometimes just find it to be easier.
Note: You can still have delicious chicken tenders if you have to skip the dry bringing step due to lack of time.
Remove It From the Fridge for 20 Minutes Before Frying.
This allows the chicken to cook evenly, but it prevents the oil from getting too cool when the chicken is added.
Thoroughly Dry The Chicken Before Breading.
- If you don’t have time to dry brine the chicken, (or even if you do), it’s important to ensure that every piece of chicken is nice and dry before you begin to bread it.
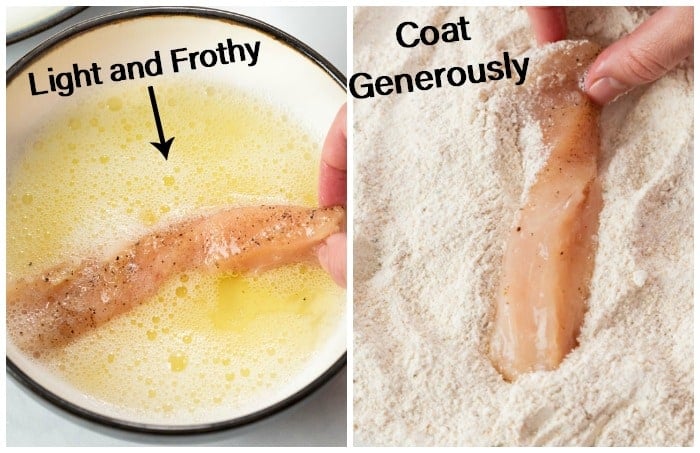
Dip it in Egg Whites Only.
- For these chicken tenders, we want super crunchy, textured fried chicken. The protein in the egg whites helps to grip and hold on to the breading. It’s also lighter and not too wet, which makes sure that it doesn’t soak through the breadcrumb mixture.
- Keeping the egg yolks is fine for Chicken Parmesan, but using only egg whites is the secret weapon in this recipe. Make sure you beat it until it becomes airy and frothy.
- If you would prefer to use the entire egg instead of just the whites, use your hands to slide off excess eggs from the chicken so that they’re not overly coated.
Bread Generously. Textured Breading is Good.
- As you bread the chicken, you’ll see it start to become more textured from transferring chicken to and from the plate. Texture in this breading is exactly what we want. (Just try to keep it dry.)
- It’s important to generously coat every nook and cranny of the chicken.
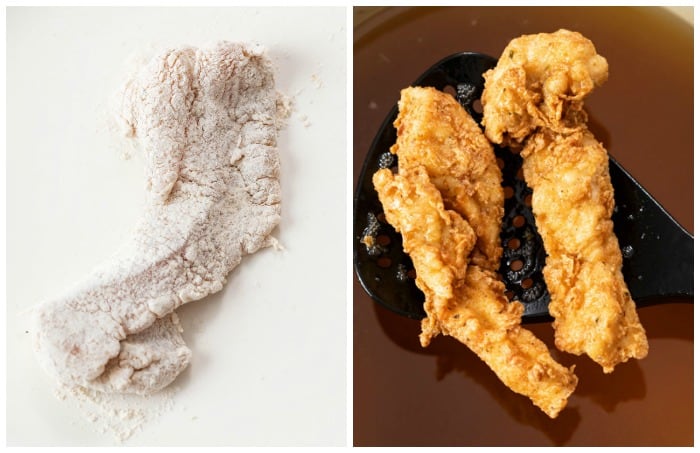
Temperature For Frying Chicken
- Perfect fried chicken is cooked in canola or vegetable oil that’s gradually heated to 350°-375°. Using an oil thermometer is key here. OR, use you can use a deep fryer.
- Throughout the cooking process, you may find that you need to decrease the temperature and increase it back up again later. As the chicken keeps cooking, the oil gets hotter. When new chicken is added, it gets cooler. Maintain a temperature that feels right for that nice golden brown color.
- If your oil gets dirty, add some additional oil to the pan to clarify it a little bit. Note that this will temporarily cool the temperature of the oil.
Reusing the Oil
- I’m going to go with Cook’s Illustrated on this one, who advises that the oil used for frying chicken can usually be used 3-4 additional times prior to discarding. They also advise as to how you can clean the oil first if needed.
- Note that some of the flavor from the fried chicken will transfer to the next batch of whatever you fry up. This can be a good thing as it gives that food even more flavor.
- I like to fry up a batch of my homemade french fries with my leftover oil. I leave the oil in my dutch oven with the cover for a few days until I’m ready to use it again. (Just don’t do this with cast iron as it will rust.)
Air Fryer Method
Disclosure: Nothing beats the flavor and texture of deep frying this chicken, but here are the instructions for air frying, if you must. 😉
- Preheat the air fryer to 375°.
- Place the breaded chicken on the air frying basket, do not overlap them and fry in batches if needed.
- Use Canola Oil Cooking Spray to generously coat the outside prior to air frying.
- Air fry for 6 minutes. Flip and spray with more Canola oil.
- Cook for 3-4 more minutes.
- Ensure the internal temperature has reached 165° prior to serving.
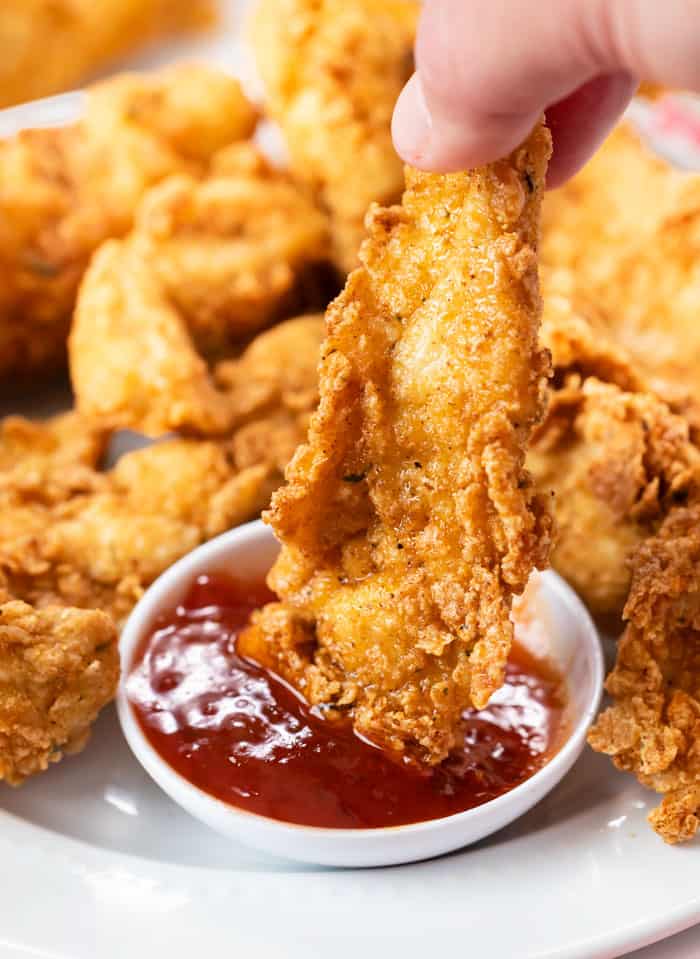
Dipping Sauces For Serving
- Try serving these with my easy honey mustard sauce!
- Other options include sweet and sour sauce, ketchup, ranch, or honey– (my personal favorite for chicken tenders and homemade chicken nuggets!)
Storage
Refrigerator
- Store leftovers in an airtight container and refrigerate for 3-4 days.
- Reheat in a 375° oven for 15 minutes.
Freezer
- You can also flash freeze on a baking sheet for 1-2 hours and store in a freezer bag for 1-2 months.
- Reheat in a 375° oven for 20-25 minutes.
Leftover chicken tenders are great in my mashed potato casserole with crispy chicken!
What to Serve With Chicken Tenders
-
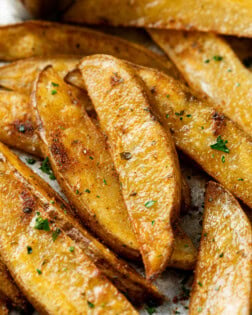
- Potato Wedges
-
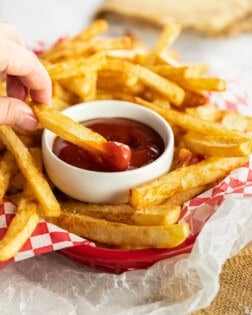
- Homemade French Fries
-
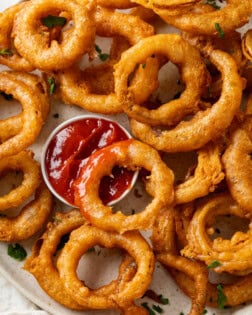
- Onion Rings
-
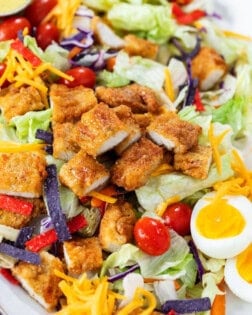
- Crispy Chicken Salad
-

- Potato Skins
-
- Homemade Mashed Potatoes
Get My Free E-Book!
- I’ve got a FREE e-Book with 7 super popular dinner recipes! Click here to join my email list and I’ll send your e-Book right over!
- And be sure to follow me on Instagram, Pinterest, & Facebook!
Tried This Recipe?
Leave a review, I love hearing your feedback! ⭐⭐⭐⭐⭐

Fried Chicken Tenders
Ingredients
- 2 large boneless skinless chicken breasts
- Kosher Salt + Pepper
- 3 egg whites
- 48 oz. canola oil, for frying
Breading
- 1 cup all-purpose flour
- 1/3 cup breadcrumbs,, plain or Italian
- 1 ½ teaspoons seasoned salt
- ½ teaspoon paprika
- ¼ teaspoon cayenne pepper
- 1 teaspoon black pepper
Instructions
- Set cooling racks over a baking sheet so that you can transfer the chicken onto the racks and allow excess oil to drip from the bottom. The air flow on all sides ensures the chicken stays crispy.
- Cut the chicken breast into strips that are about ¾ inch thick and 5 inches long. Pat completely dry. Sprinkle lightly with salt and pepper on each side. (Use about 1/4-1/2 teaspoon coarse or kosher salt per pound of chicken)
- Optional Step #1: Dry brine the seasoned chicken breast by letting it sit uncovered in the fridge for 4 hours on the bottom shelf. This keeps it dry on the outside which allows the breading to stick to it well. It also allows the salt to penetrate through the chicken which allows the inside to become juicy, tender, and flavorful.
- Optional Step #2: If possible, remove the chicken from the fridge 20 minutes before frying for even cooking throughout.
- Combine the breading ingredients and set aside.
- Crack egg whites into a small bowl, save the egg yolks for another dish if desired.
- Beat the egg whites until fluffy and frothy.
- Place saran wrap over the chicken and use the rough side of a meat mallet to pound the meat and create texture on the outside, this allows the breading to work it's way into the crevices and creates grip to hold on to the breading.
- Dip each piece of chicken into the egg whites, then coat it generously in the breading mix, allow every cook and cranny to get thoroughly coated.
- Add oil to a dutch oven, fill it no more than halfway. Heat to 350-375 degrees. (You can also use a deep fryer.)
- Fry the chicken tenders in batches, each side will take about 4 minutes to sufficiently brown. Remove and transfer to cooling racks.
- PRO TIP: Transfer cooling racks to a 200° oven to keep the chicken warm while you fry the remaining batches.
- Ensure the internal temperature has reached 165° prior to serving.
Notes
Air Fryer Method: Disclosure: Nothing beats the flavor and texture of deep frying this chicken, but here are the instructions for air frying, if you must. 😉
- Preheat the air fryer to 375°.
- Place the breaded chicken on the air frying basket, do not overlap them and fry in batches if needed.
- Use Canola Oil Cooking Spray to generously coat the outside prior to air frying.
- Air fry for 6 minutes. Flip and spray with more Canola oil.
- Cook for 3-4 more minutes.
- Ensure the internal temperature has reached 165° prior to serving.


How much salt and pepper do you need to use?
I just do a light sprinkle on each side, maybe 1/4 teaspoon pepper and 1/2 teaspoon salt?
I have a question, are the egg whites frothy like meringue?
I’ve never gotten them to that extent of frothiness before, they’re still thin but bubbly!
My picky grandchildren loved these.
Yayyy! I’m so happy to hear that!😃 These are definitely kid approved. My picky daughter loves them! Thanks so much for the review!
I’ve been chasing a good chicken tender recipe for quite awhile now. Tonight finally found the one I will use from now on. Thank you they were amazing!
I’m so happy to hear that Laura!😊 I spoiled my daughter with these and this is pretty much the only chicken she will eat! Thanks so much for the review!
I dont know what im doing wrong my breading always falls off. Can you tell me how yours stays on?
Hi Tonya!! First, I make sure to really thoroughly coat my chicken in every nook and cranny, it’s totally covered and dry with no wet spots when it goes into the oil. While the chicken fries, I bread the next batch so that I’m basically breading them just before they’re going to be fried. I’m not sure if you use a deep fryer or fry in your own pot on the stove, but I am constantly adjusting the oil if I’m using a dutch oven or anything other than a deep fryer. When you first start to fry, you add the chicken and it cools down the oil but as the chicken keeps cooking, the oil gets hotter and you may have to turn it down a bit. This not only ensures that the chicken doesn’t burn but that it’s not frying so rapidly that the breading falls off. It’s also really important not to overcrowd them when they’re frying, so you’ll want to fry in batches. I hope that helps!!
I only have panko breadcrumbs on hand. Will that work?
That should work but I haven’t tested it!
Can you make these with chicken tenders instead of cutting up the breasts, or would they be too thin?
I think that should be just fine! 🙂
puzzled about the egg parts – you say use only the whites but the directions talk about the yolks and the picture sure looks like yolks rather than whites – can you clarify, please? i really want to try this – but i want to do it correctly!
Hey Susan!! You want to dip in egg whites only! I found the spot where I accidentally said yolks, so sorry for the confusion, I fixed it! 🙂 I’d love to hear how these turn out for you!
These were the best chicken tenders EVER. I’ll never (ever) use frozen ones again. Thank you. Family Loved it.
So happy to hear that Melissa, I feel the same way! 😉
Have you tried making these ahead and freezing then for later use? My kids love chicken tenders but I don’t love using the frozen ones with all the added preservatives. Would the breading hold up through freezing then reheating in the oven?
Hey Holly! I definitely think that would work, cook them fully as instructed and let them completely cool. Then store in freezer storage bags just like you would with store-bought chicken tenders! 🙂
WOW. I can’t believe how quickly these disappeared, I’m making a double batch next time! Thank you for all of the tips in this post! My family LOVED these. SO crunchy and crispy!
Hey Tiff! I am so happy to hear that, I tested a lot of different methods before landing on this one. So happy that your family loved it also, really appreciate you taking the time to leave a review!! -Stephanie