 Get my Cookbooks!
 Ciabatta Bread
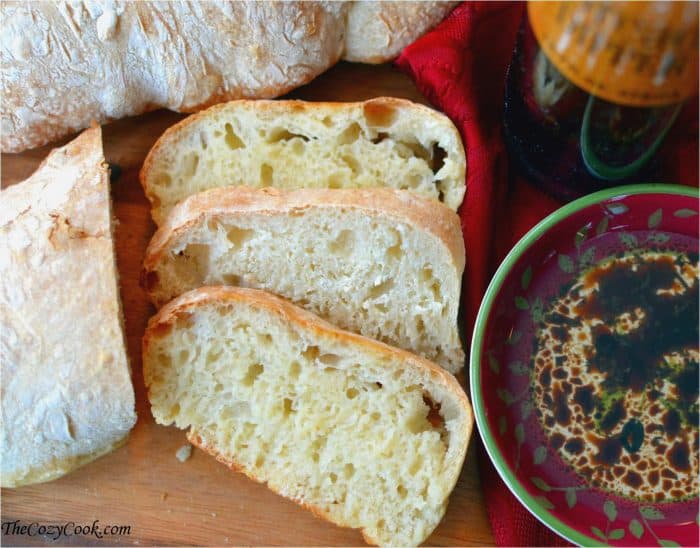
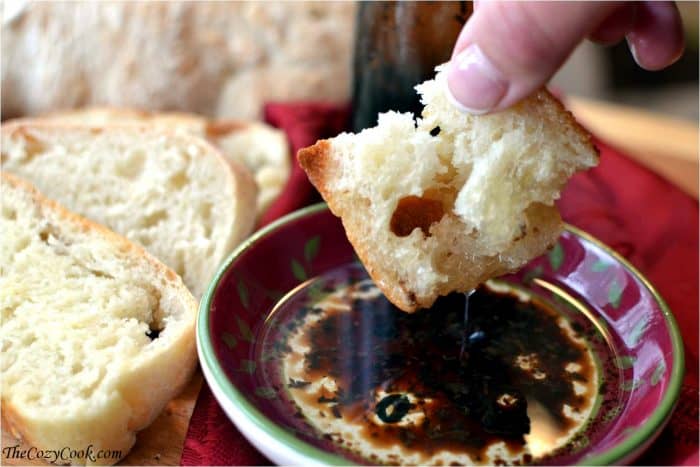
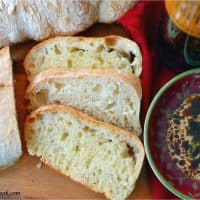
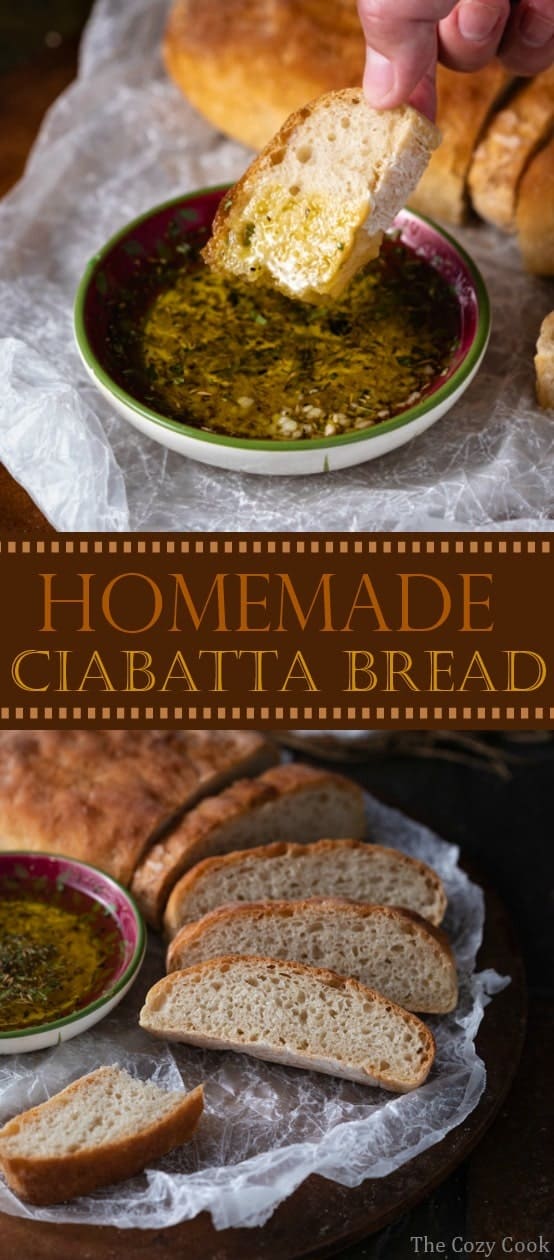
This crispy crusted homemade ciabatta bread has a soft, warm center with little crannies that are perfect for dipping into seasoned oil, butter, soups, dips, and more!
Hi, my name is Stephanie. And I am not, a baker. So it’s just amazing that I’ve been able to make this recipe for years and never mess it up. I mean, some days the holes are larger, some days the dough rises up higher, but ultimately, it’s always been delicious. There are so many different methods to making this bread, some recipes have literally have about 6,000 steps. I like to keep things as simple as possible, and at the end of the day, the bread comes out just as good. So let’s get into it.
What is Ciabatta Bread?
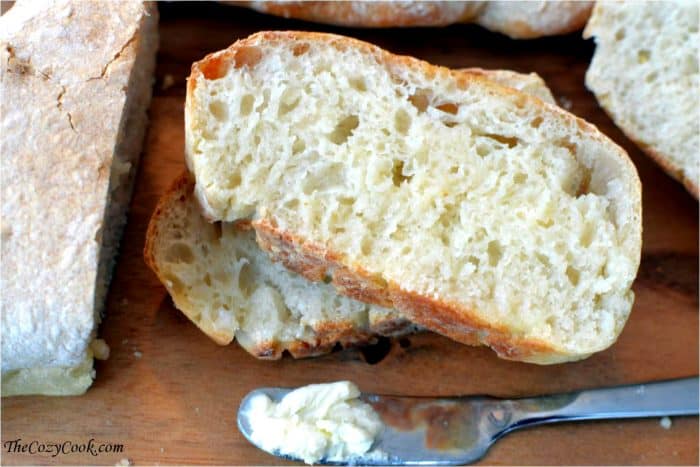
Ciabatta bread is an Italian bread with a crispy crusted outside, and a soft and airy inside. The crannies on the inside are a perfect way to absorb seasoned oil, sauces, and dips. Ciabatta bread also makes a great sandwich bread.
What is a Starter Dough?
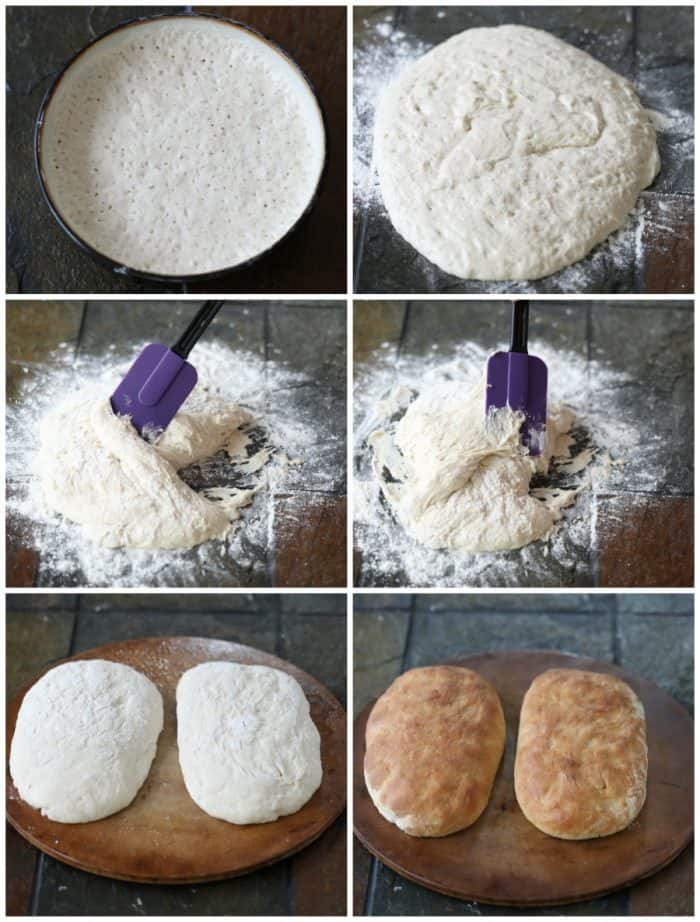
A starter dough (or “sponge”) is a simple mixture of yeast, water, and flour that sits for an extended period of time to allow it to ferment. It is then added to dough and acts as a leavening agent, perhaps with the addition of more yeast. This helps create the best tasting bread.
👉The top left image is what the starter dough will look like when its finished, nice and porous!
Storing Ciabatta Bread
Before storing, ensure that the bread has cooled completely. Then wrap it tightly in foil or in an airtight plastic bag. Leave it at room temperature, do not refrigerate as that will cause it to dry out. It will remain good at room temperature for 2-3 days.
Can You Freeze Ciabatta Bread?
Yes! To freeze Ciabatta bread, wrap it in aluminum foil or freezer plastic wrap and place it into an airtight freezer bag. It will be at its freshest if used within 3 months, however it’s still safe beyond that time-frame.
Ways to Use Leftover Ciabatta Bread
–Homemade Croutons are a perfect way to use up leftover Ciabatta bread.
-French Toast is also a delicious way to make use of bread that’s a few days old.
Try These Next!
- Copycat Texas Roadhouse Rolls
- Copycat Texas Roadhouse Butter
- Red Lobster Cheddar Bay Biscuits
- Homemade Croutons
Get My Free E-Book!
- I’ve got a FREE e-Book with 7 super popular dinner recipes! Click here to join my email list and I’ll send your e-Book right over!
- And be sure to follow me on Instagram, Pinterest, & Facebook!
Homemade Ciabatta Bread
Ingredients
Yeast Starter Dough: (Needs to sit for 8-12 hours. Overnight works well too)
- 1/2 tsp. rapid rise yeast
- 3/4 cup room temperature water
- 1 cup bread flour or all-purpose flour
Ciabatta Dough:
- 1/2 teaspoon rapid rise yeast
- 3/4 cup room temperature water
- Yeast Starter Dough, from above
- 2 cups bread flour or all-purpose flour
- 1 1/2 teaspoons salt
Instructions
Phase One: Starter Dough:
- Combine the ingredients in a medium bowl, stirring well. Cover with Saran Wrap and let it sit at room temperature for 8-12 hours, or overnight. This dough doesn't rise so you won't need excess room in the bowl.
Phase Two: Ciabatta Dough:
- In a large bowl, combine the yeast and the water. Add the starter dough and mix gently. Add the flour and salt and mix until combined.
- Use a hand mixer and mix the dough on low for 3 minutes, then let it sit for 10 minutes.
- Repeat, mixing for another 3 minutes and letting it sit for 10.
- Remove the dough with a silicone spatula and drop into a large oiled bowl. Cover with plastic wrap and let it sit for 45 minutes.
- Use the same silicone spatula and drop the dough onto a floured surface. Sprinkle the top of the dough with flour. The dough will be extremely sticky.
- Take one end of the dough and fold it up into the middle. Take the other end, and fold that one into the middle.
- Sprinkle more flour on top of the dough and let it sit for 15 minutes.
- Repeat the two prior steps again, folding and letting it sit for another 15.
- Take the bread and create an 8x8 inch square.
- Use a sharp knife and cut the square in half. Cover each of the loaves with a light dish towel and let it sit for about 30 minutes.
- Preheat the oven to 475 degrees while it sits.
- Gently lift the loaves onto a greased baking sheet, trying to touch them the least amount possible.
- Bake for 17-25 minutes, (mine was ready after 17 exactly so I’d keep an eye on it a little before that time.)
- Let it cool on a cooling rack and then slice it up and serve!


I made this today for my first attempt at something different than a no-knead recipe and it turned out great! I was skeptical about the “room temp water” but it worked perfectly! I even mixed it by hand since I don’t have an electric mixer and it was still amazing!
Hey Bee!!! WAHOOOOO, that’s awesome to hear! I’m telling you, if I can make this one, anyone can! I’m super happy that it turned out well. Thanks for letting me know!!!!
When you mixed by hand did you need to knead it longer than the directions for the recipe? I just made the starter and hope I can get this to come out as well as yours did but I will be doing this by hand as well. I am new to bread making and Cibatta is my boyfriend’s favorite. So hoping I can manage this!
Hi Gwen! I actually didn’t use a mixer either and used my hands for three minutes and it was a-okay! Also, I saw that you had to post your question twice, but they did both come through. If you ever have a chance to let me know what made you think that the first comment did it come through, I would love to try to fix it. This has been happening more frequently lately! Anyway, good luck with the bread! I am sure it will be terrific!
Stephanie, I actually asked both you and Bee about hand mixing. I was hoping and praying for a response! So this was just ME being Blonde and desperately seeking advice! Thanks again, for that much needed advice. I am still so stoked that I actually made Cibatta bread. My boyfriend is telling me to thank you as well! SO, Thanks! We both loved it and ate both loaves!
Making this today……my question is: after letting the dough rise for 45 mins, and doing the folding bit, you then repeat the 3 min mix, rest 10, 3 min mix, rest 10, then let it rise a 2nd time for 45 etc? Also, do you use dough hooks on your mixer? My hand mixer doesn’t seem to do well with a heavy sticky dough. Thanks !
Hi Pennie!
I’ve updated the instructions just slightly to clarify this, you don’t have to let it sit for 45 minutes twice. What you repeat is the folding and letting it sit for 15 minutes, you’ll want to do that two times. If you read the instructions again and are still unclear definitely let me know, I know it’s a lot of repetition and can get confusing.
A dough hook on the mixer would work extremely well!
Enjoy this bread!!!
Ahhhhhh……that makes much more sense to me……and is exactly what I was inclined to do ! Thanks for your quick reply !! 🙂
Excellent! I’m glad it makes sense and I’m happy that you asked so that I could clarify those instructions! 🙂
Question…when it says to repeat, does that mean we add another 2 cups of flour, 1.5 tsp. salt and .5 tsp. yeast?
Thank you!
Hi Jaime! The repeat is in reference to mixing again and letting it sit, no need to add anything to it:) thanks for checking and enjoy!!
I too am a bread lover, but also have to be on a low sodium diet. Most breads and recipes I see require salt, and store bought bread is very high in sodium. My question is – is it OK to leave the salt out of bread recipes like this one? How will it change the bread if I leave it out?
Hi Stephanie,
See this excerpt that I found online about leaving salt out of bread:
“If you make a bread without salt, you will have to make the dough dryer as well. Salt (for lack of a better word) competes with gluten and yeast for moisture. Without the salt, the yeast will work a bit faster (this effect isn’t that pronounced) and the gluten will be very soft. The effect on the gluten usually causes loaves without salt to fall flat as the gluten is overly extensible but not very elastic. This could cause your loaves to collapse, as without salt it is very hard to maintain the tension of the outer gluten sheath.
The lack of salt will make the bread taste very “flat”. While there are breads traditionally made without salt, they are usually served with very flavorful accompaniments like olives and sardines. Depending on what you’re using the bread for, I’d suggest using an enriched dough as the added flavor of eggs, butter, and/or sugar will also help to cover the lack of salt.”
…That being said, I would probably be hesitant to exclude the salt on this one!
Source: http://cooking.stackexchange.com/questions/41501/bread-with-no-salt
I also am on a low sodium diet. I cut the salt in the bread to .5 tsp and it worked well.
So happy that you enjoyed it Krista!! 🙂
I did this with organic spelt flour and it worked amazing! Seriously fool proof because I can never successfully make bread! And it tasted amazing! Making more tonight with organic white flour. Next up will be sprouted flour!
Hi Cassie! I’m SOOOO glad this turned out well for you! I shocked myself when I made it too- it really does seem to be pretty fool proof, which is awesome because I’m FAR from a fancy bread maker!! I love how you’re experimenting with different flours, that’s awesome- I hope they all turn out as well as the first batch! Thanks for letting me know how it came out 🙂
Stephanie, it seems like you know very well about making bread. The recipe for Ciabatta bread would have my wife go crazy for. She enjoys making these type of bread for the family whenever it comes to dinner time.
I made this bread last night and initially I was very concerned about the ‘soupiness’ of the dough but I resisted the urge to add more flour and read your notes. The results were great!
Hi ! I just wanted to know before i make the bread , what do you know by room temperature water ? Shouldn’t it be warm ? How will it sctivate by room temperature water ? Please reply , thank you for this beautiful recipe !!
hi there! Thought we are using room temperature, the reasoning is similar to this, which I found at Food52online: “Cooler temperatures also result in a slower proofing time, which for those that are typically under the artisan umbrella (baguette, focaccia, ciabatta, for example), is ideal. You get lots of ancillary bacterial development in those long, slow proofing times. Too, heat is one of the by-products of fermentation, so stay with a cooler water and let the dough develop it’s own little environment. Cool water probably shouldn’t be over 80 degrees, and warm between 90 and 100.”
Thank you so so much for the information
I’m so sorry that this didn’t work! This is a very high hydration dough. My research even has some people describing this type of dough as soupy. Though I didn’t experience quite that much moisture, the fact that you did doesn’t necessarily mean you did anything wrong. The process of folding and resting will gradually allow you to see the mixture become more “dough” like and less soupy, as it helps build gluten and elasticity. I bet you could get it if you tried it again! A warmer environment never hurts either. Good luck, if you’re successful please do let me know! PS- Make sure your yeast is fresh too!
I wondered about the environment as I live on the Pacific Northwest Coast…cool, damp, and wet. I am trying again. How long can I leave the starter dough out, does it have to be put in the fridge at some point so I don’t kill people off with food poisoning? I made starter dough yesterday then had an emergency and had to leave so I threw it in the fridge where it is still sitting well over 24 hours later. Will I have to make the starter again?
Hi Sedona,
I think you should be just fine with the starter dough that you’ve already prepared and put in the fridge! Also, a few tricks for when you’re letting it rise with the plastic wrap on top- since you’re in a cooler/damp environment, you can try either putting the bowl in the oven with the oven light on (but the oven off) while it rises. Or, you could put a bowl of water in the microwave for a few minutes. Then immediately remove the bowl of water and place the covered bread in the microwave and shut the door (microwave off).
I think you’ll have better luck this time around, knowing that soupier dough at first is okay, and that it should firm up as it gets folded and rests.
GOOD LUCK, keep me posted!!!! 🙂
Woo Hoo! Much better this time! I think the first time my yeast didn’t activate….I did what you suggested and put it in the oven with the light on…dough did get firm this time…my loaves don’t look as nice as yours do…I am going to keep trying! Thanks
Sedona, that’s GREAT news!!!! Good work, practice makes perfect! I’m so happy!! At least it will taste just as good even if it’s not picture perfect!! I’m so glad you tried again!!!
Could I just fantasize your bread while I take my coffee for today? You bread is so beautiful, Steph. If I could just marry that bread. 😀
Thank you Jhuls! Man, I wish I could send you a slice of bread right now! It’s just too good, one of my biggest weaknesses. (That, and cheese.) 😉