Homemade Pizza
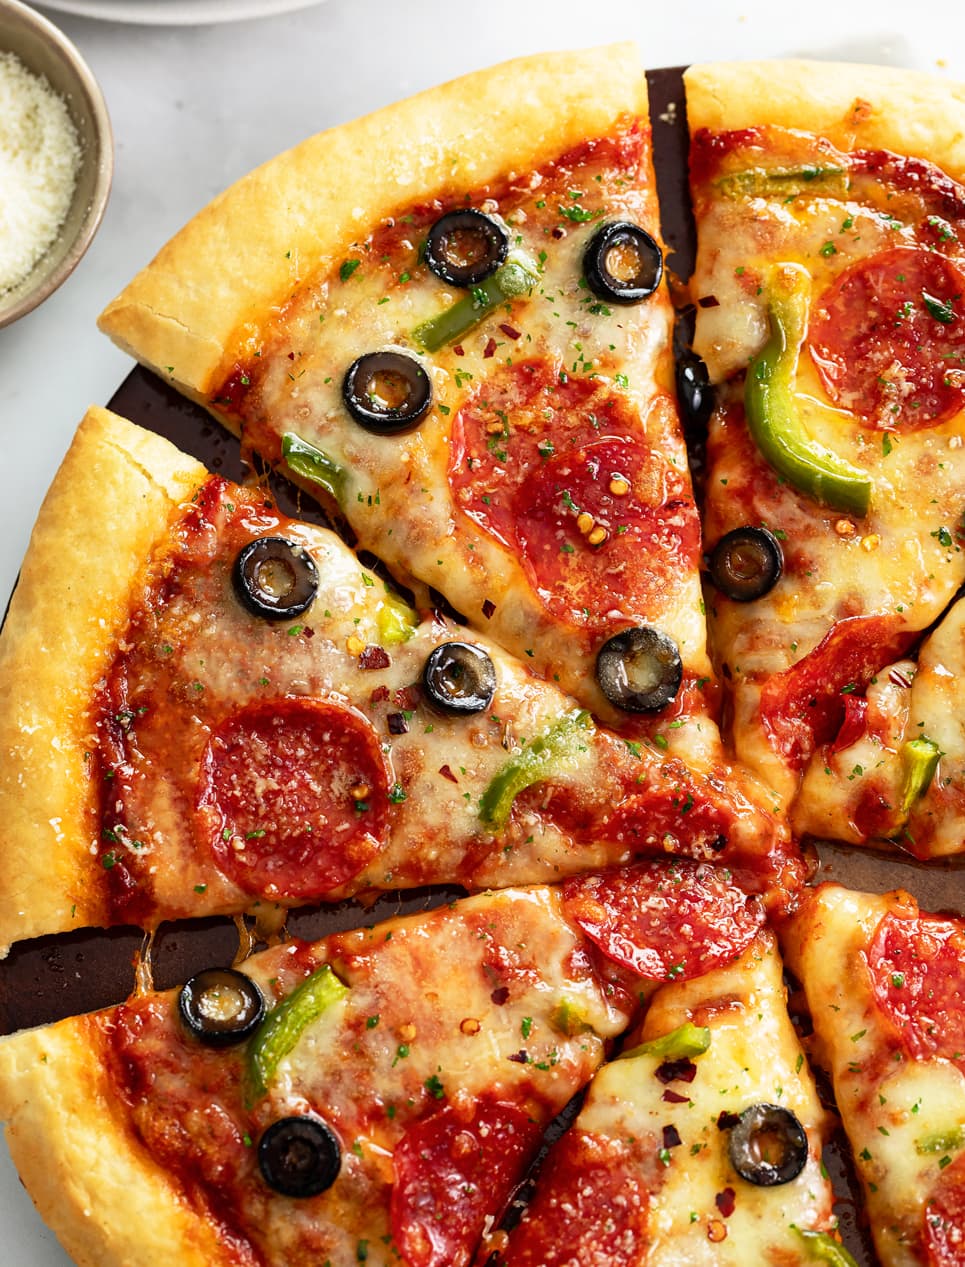
This homemade pizza recipe is easy to make with restaurant quality dough that bakes up to golden perfection! Top it with pizza sauce, mozzarella cheese and your favorite toppings and get ready for the best pizza ever.
Be sure to try my Buffalo Chicken Pizza and Hawaiian Pizza recipes next!
Homemade Pizza
Nothing beats homemade pizza night! This incredible pizza dough is easy to make and bakes to golden perfection for a crust that’s crisp on the outside, and soft and pillowy on the inside. (If you’re not a crust eater, that’s about to change!) 🍕
The other thing I love about this crust is how sturdy it is, with just the right amount of thickness. Don’t be afraid to pack on the toppings, this pizza dough can handle it!
Don’t miss my pro tips, make-ahead method, and topping suggestions below!
How to Make It
See recipe card below this post for ingredient quantities and full instructions.
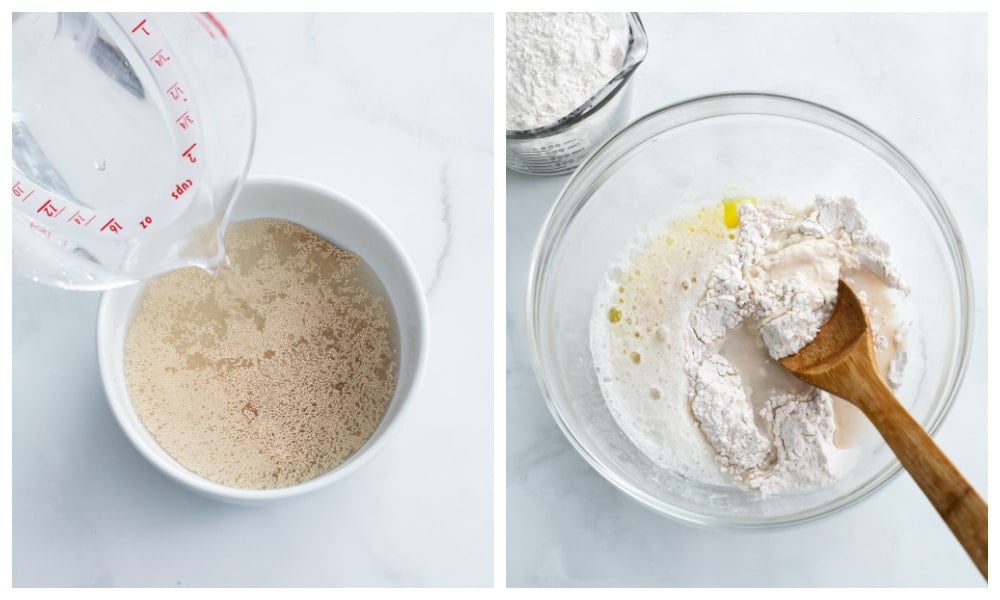
Add the yeast to a small bowl with sugar and warm water (105-115°). Cover with saran wrap and let it sit for 5 minutes.
In a medium bowl, add half of the flour, salt, and garlic powder. Stir to combine. Add the yeast mixture, oil, and gradually mix in remaining flour.
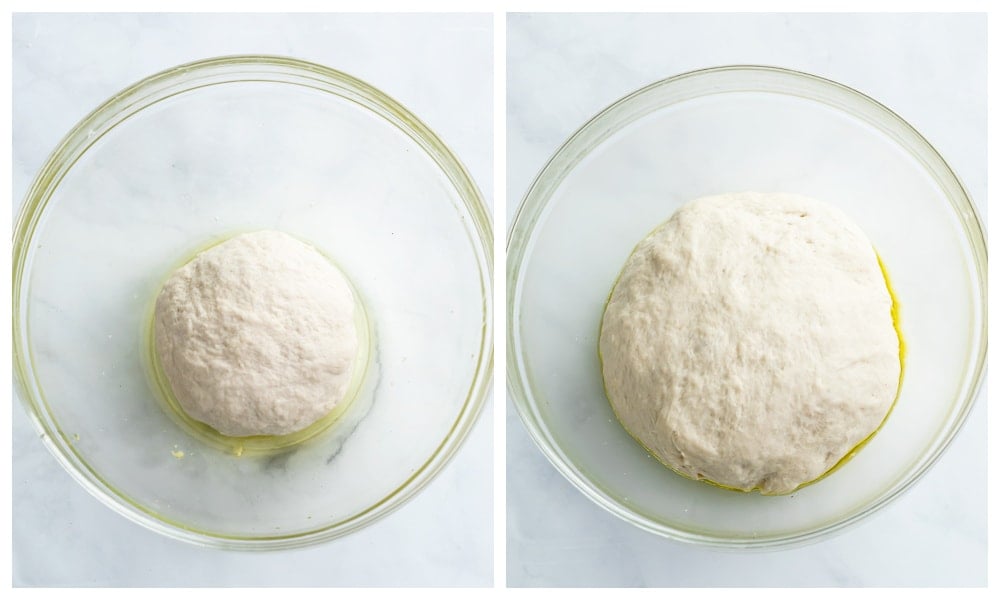
Knead for 3-5 minutes and transfer to a clean bowl. Cover with saran wrap and let rise until doubled by half, (30-60+ minutes), or overnight in the fridge. Gently punch it down and knead 5 times. Spread into a 12-inch circle and transfer to a preheated, floured pizza pan (or stone).
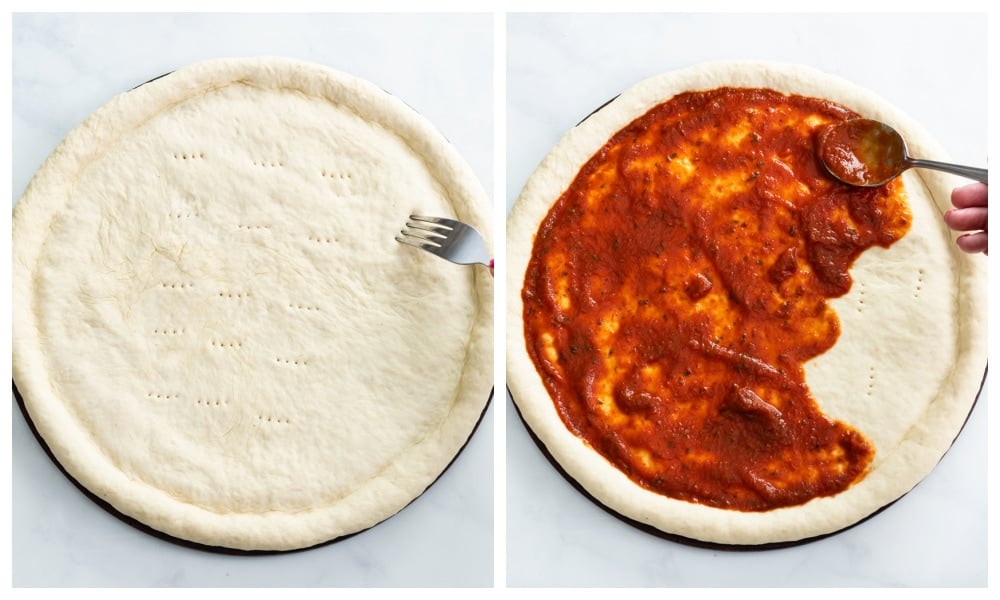
Use a fork to poke holes in the crust to keep it flat while baking. Brush with olive oil, then top with sauce.
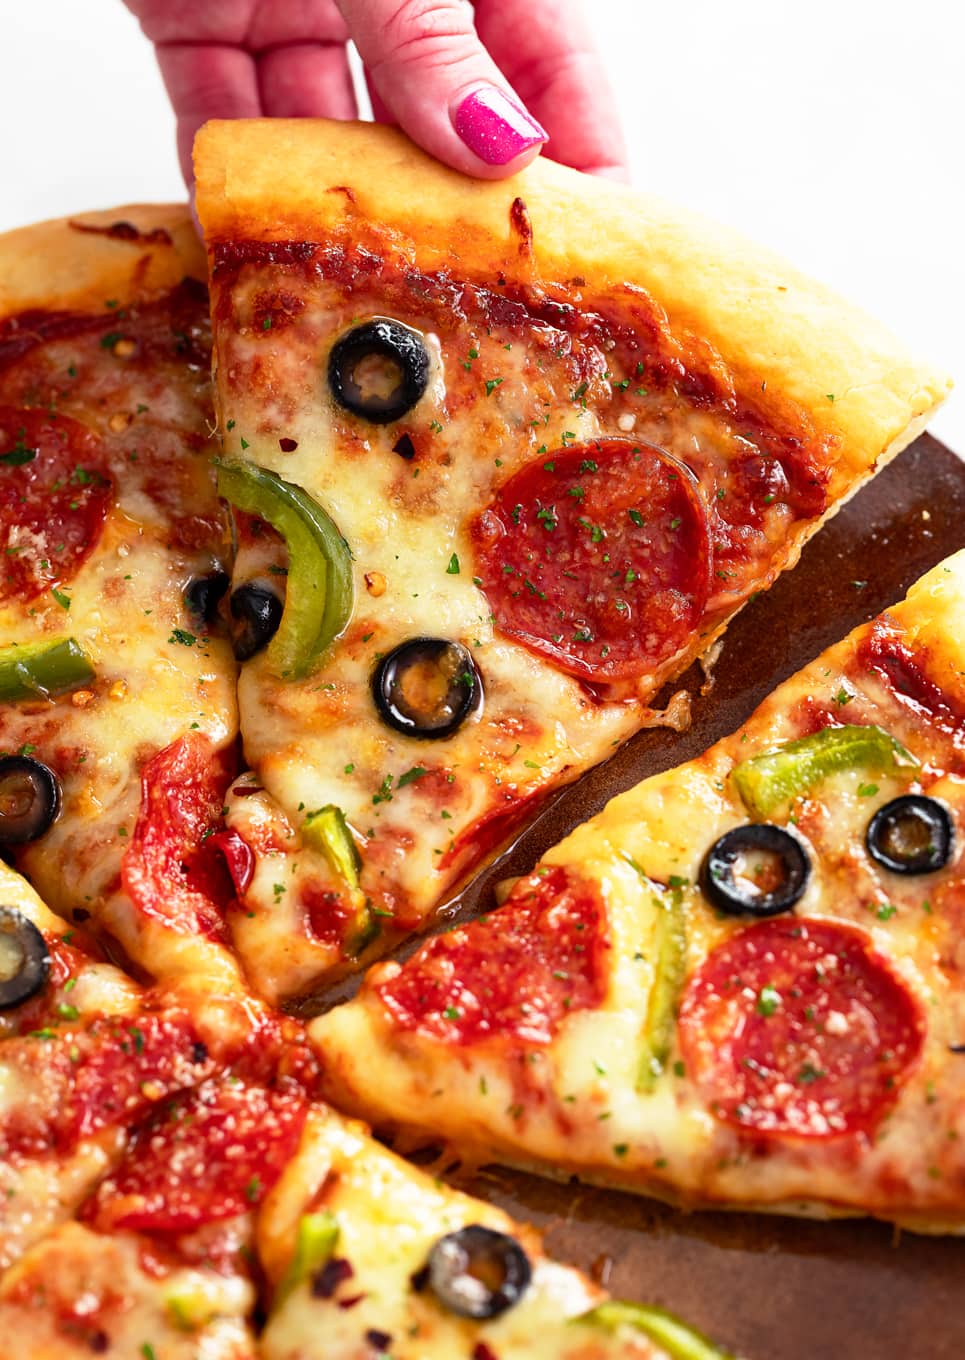
Top with cheese and toppings. Bake in a preheated 450° oven for 13-15 minutes. Remove, slice, and serve!

Bread Flour vs. All Purpose Flour
- Bread flour or all-purpose flour can be used for this recipe. Bread flour has more protein, which results in higher gluten, which results in stretchy dough and slightly chewier crust.
- I recommend weighing your flour to ensure your final outcome is as expected, they generally weigh the same.
- Gluten Free Flour: This 1 to 1 baking flour may also be used in this recipe.
Oven Temperature for Pizza
- A super hot oven temperature is ideal for pizza. Restaurants bake theirs at temperatures over 850°! (But we won’t mimic anything close to that at home.)
- A 450° oven yields a great result, make sure the oven is very sufficiently preheated. (When it says it’s ready, give it at least an extra 20 minutes if possible.)
Homemade Pizza Toppings
- Meats: Pepperoni, Hamburger, Sausage, Bacon, Ham, Buffalo Chicken, BBQ Chicken, Chicken Tenders, Grilled Chicken, Pulled Pork, Capicola, Salami, Meatballs.
- Veggies: Onions, Peppers, Mushrooms, Tomatoes, Spinach, Broccoli, Banana Peppers, Jalapeno Peppers, Garlic, Basil, Leeks.
- Other: Pineapple, Olives, Mozzarella, Parmesan, Feta, Ricotta, Goat Cheese, Oregano, Thyme, Rosemary, Red Pepper Flakes, Marinara Sauce, Blue Cheese, Ranch, BBQ Sauce.
- For the Crust: Brush my Olive Oil Bread Dip on the crust for crazy good flavor!
Pro Tips
- Yeast: This recipe calls for Instant Yeast, but I’m always successful when I use Active Dry yeast as well.
- Rising Trick: A warm environment (75-78° F) is ideal for rising. I’ll sometimes place a dish towel in the dryer to warm it up, and place that over the saran wrap on the top and sides of the bowl while the dough is rising if I’m experiencing a colder NH day!
- Salt: Non-iodized salt is best for baking. (Table salt is generally supplemented with iodine, which can generate a bitter taste in baked goods.) I use Redmond Real Salt for all of my baking and cooking recipes. (Enter code ‘COZY‘ for 15% off!) Of course, table salt can definitely be used if that’s what you have on hand.
- Cheese: Be sure to use whole milk, low moisture mozzarella for this (not fresh). Shred it fresh from a block, it will melt much better. I use Dragone or Galbani.
- High Altitudes: Baking at a high altitude typically requires adjustments, see this guide from Bob’s Red Mill on what adjustments may be needed for this recipe.
- Recipe Variations: For a quicker version without homemade dough, you can use 1 lb. of store-bought dough, or try my French Bread Pizza or Naan Pizza! For a low carb option, try my Zucchini Crust Pizza. For a fun twist, try my Buffalo Chicken Pizza, Hawaiian Pizza, Pizza Dip or Pizza Pasta recipes!
Storing Leftover Pizza
- Store in an airtight container and refrigerate for 3 days or freeze for up to 3 months.
- If frozen, thaw before reheating. Do this overnight in the fridge or use a thaw/defrost function in the microwave.
To Reheat:
- Place cold pizza on a rimmed baking sheet and cover with foil. (The foil prevents it from drying out.) Try to tent the foil so that it doesn’t stick to the top of the pizza.
- Place on bottom oven rack. Set oven to 275° F. Bake for 25-30 minutes.
- This is a little time consuming, but by far the best way to restore it back to its original consistency.
Make-Ahead Method
- Prepare the dough as outlined in the recipe. Instead of rolling it out for baking, shape into a ball and lightly spray it with nonstick cooking spray. Wrap it tightly in plastic wrap, then place it in a Ziploc freezer bag.
- Refrigerate for 3-4 days or freeze for 3-4 months.
How to Thaw Frozen Pizza Dough
- Let frozen dough thaw in the fridge for about 8 hours or overnight. Let it sit out for 30 minutes, then prepare pizza as outlined.
Tools For This Recipe
(Amazon affiliate links)- Check out all of my kitchen essentials here.
- Cheese Grater– Always shred whole milk, low moisture mozzarella from a block! It will melt and taste much better.
- Kitchen Scale– Weigh flour when baking whenever possible, this can ensure your finished product comes out as expected!
- Mixing Bowls– These 3 sizes are perfect for the bowls needed in this recipe!
- Wooden Spoon– Nice and sturdy for mixing!
- Rolling Pin– My preferred tool for rolling out the dough.
- Pizza Stone– Ensures optimal and efficient cooking. (Works well for bread, cookies, and calzones as well!)
- Pizza Cutter– This one takes up little space!
- Cheese and Red Pepper Flakes Shakers– Just like the restaurants use!
Try These Next
- Stromboli
- Chicken Parmesan
- Buffalo Chicken Pizza
- Pizza Pasta
- Baked Ravioli
- Stuffed Shells
Get My Free E-Book!
- I’ve got a FREE e-Book with 7 super popular dinner recipes! Click here to join my email list and I’ll send your e-Book right over!
- And be sure to follow me on Instagram, Pinterest, & Facebook!
Tried This Recipe?
Leave a review, I love hearing your feedback! ⭐⭐⭐⭐

Homemade Pizza
Ingredients
For the Dough
- 2 ¼ teaspoons instant yeast, equal to 1 packet. See notes
- ¾ cup warm water, 105-115° F
- 2 teaspoons sugar
- 2 cups all-purpose or bread flour, plus up to 1/3 cup as needed (250-290 g)
- 1 teaspoon salt
- ¼ teaspoon garlic powder
- 2 tablespoons olive oil, plus more for bowl/crust
For the Pizza
- ½ cup pizza sauce
- 1 ½ cups mozzarella cheese, whole milk low moisture
- pizza toppings, as desired
Pizza Garnishes
- Roughly chopped parsley
- Freshly grated Parmesan cheese
- Red pepper flakes
Instructions
- In a small bowl, dissolve the yeast and sugar in the warm water. (The warm water and sugar activates the yeast.) Cover with plastic wrap and set aside for 5 minutes.
- In a large bowl, add the salt, garlic powder, and 1/2 of the flour. Stir to combine. Add the warm water/yeast mixture and the olive oil. Use a wooden spoon to stir well, then gradually stir in the remaining cup of flour. Continue to stir until an elastic ball has formed, slightly sticking to the sides of the bowl.
- Dust your hands with flour and knead the dough in the bowl for 3-5 minutes. If the dough becomes too sticky, gradually add additional flour in small dustings, up to 1/3 cup additional. If you poke the dough with your finger and it slowly comes back, it’s ready to rise. Shape into a ball.
- Drizzle a separate large glass bowl with a little olive oil and use a pastry brush to distribute the oil on the bottom and sides. Add the ball of dough. Cover with plastic wrap and allow it to rise for 30-60+ minutes, until doubled in size. (This gives time to for the gluten to develop, which allows the dough to stretch without breaking.) You can also let it rise in the fridge overnight.
- Preheat oven to 450° F during the last 30+ minutes to ensure it has plenty of time to get fully up to temperature. Optional: Place the pizza pan (or stone) in the oven as it preheats.
- Gently punch down the dough and knead it 5 times to smooth it out.
- Spread the dough into an even 12-inch circle, either with your hands or with a rolling pin. (I also like to use my fingers to form a crust along the edge.)
- Remove the pizza pan from the oven and sprinkle it with a thin, even layer of flour. Transfer the dough onto it.
- Use a fork to gently poke holes in the dough to prevent the crust from bubbling up as it bakes. Drizzle it with 1 tablespoon olive oil and use a pastry brush to spread it out over the dough.
- Top with pizza sauce, cheese, and toppings.
- Bake for 13-15 minutes. Even if the cheese is melted, give the crust enough time to cook and crisp on the bottom, resist the urge to remove it too early, but don’t let it get too brown on the top. Mine takes 15 minutes exactly.
- Remove the pizza from the oven and use a spatula to lift the crust to check the bottom, ensuring it’s slightly browned and crisp.
- Garnish with parsley, grated Parmesan, and red pepper flakes if desired. Slice and serve!
Notes
- Yeast: This recipe calls for Instant Yeast, but I'm always successful when I use Active Dry yeast as well.
- Rising Trick: A warm environment (75-78° F) is ideal for rising. I'll sometimes place a dish towel in the dryer to warm it up, and place that over the saran wrap on the top and sides of the bowl while the dough is rising if I'm experiencing a colder NH day!
- Salt: Non-iodized salt is best for baking. (Table salt is generally supplemented with iodine, which can generate a bitter taste in baked goods.) I use Redmond Real Salt for all of my baking and cooking recipes. (Enter code 'COZY' for 15% off!) Of course, table salt can definitely be used if that's what you have on hand.
- Cheese: Be sure to use whole milk, low moisture mozzarella for this (not fresh). Shred it fresh from a block, it will melt much better. I use Dragone or Galbani.
- Gluten Free Flour: This 1 to 1 baking flour may also be used in this recipe.
- High Altitudes: Baking at a high altitude typically requires adjustments, see this guide from Bob's Red Mill on what adjustments may be needed for this recipe.
- Recipe Variations: For a quicker version without homemade dough, you can use 1 lb. of store-bought dough, or try my French Bread Pizza or Naan Pizza! For a low carb option, try my Zucchini Crust Pizza. For a fun twist, try my Buffalo Chicken Pizza, Hawaiian Pizza, Pizza Dip or Pizza Pasta recipes!
- See blog post for information on using all-purpose flour vs. bread flour and pizza topping options.
Make-Ahead Method:
- Prepare the dough as outlined in the recipe. Instead of rolling it out for baking, shape into a ball and lightly spray it with nonstick cooking spray. Wrap it tightly in plastic wrap, then place it in a Ziploc freezer bag.
- Refrigerate for 3-4 days or freeze for 3-4 months.
- Thaw completely and let it sit out for 30 minutes prior to using.
Storing Leftover Pizza:
- Store in an airtight container and refrigerate for 3 days or freeze for up to 3 months.
- If frozen, thaw before reheating. Do this overnight in the fridge or use a thaw/defrost function in the microwave.
- See blog post for my recommendation on reheating leftover pizza.
The nutritional information provided is an estimate and is per slice. This recipe makes 8 slices and assumes only the sauce and cheese are used as toppings.


 Get my Cookbooks!





I love the dough recipe. I think I put too much pepperoni on it. My husband wanted it totally covered with pepperoni. But the end product to me tasted too salty!! I think I need to put less pepperoni and more mozzarella! Any advice?
Hi Peg! I think it comes down to personal preference, you and your husband may need to hash this one out 🙂 You want more cheese, he wants more pepperoni, and I give my own measurements here already. ❤️