

 Get my Cookbooks!
Beef Enchiladas

These Beef Enchiladas are filled with perfectly seasoned ground beef, black beans, green chilies, and melted cheese, then topped with flavorful enchilada sauce and baked until hot and bubbly! This easy homemade recipe is perfect for a family dinner and can be prepared ahead of time!
Be sure to try my White Chicken Enchiladas and my Burrito Bowl recipe next!

Beef Enchiladas
After sharing my popular Chicken Enchiladas recipe, I knew I had to make a beef version, and this one does not disappoint!
The ground beef filling is what makes these enchiladas so good. It’s seasoned with a flavorful combination of spices, beef broth, lime juice, and a touch of honey, then combined with black beans, green chilies, and cheese.
Everything gets rolled into soft tortillas, topped with my favorite Homemade Enchilada Sauce, and baked until the cheese is perfectly melted.
These are great for feeding a crowd, and I love that they can be assembled ahead of time or frozen for another day. Be sure to check out my Pro Tips below for the best results!
How to Make It
Note: This is an overview. See recipe card below this post for ingredient quantities and full instructions.
Prepare filling in a skillet and spoon onto the bottom third of a tortilla and sprinkle with cheese.

Spread a little enchilada sauce on the bottom of a baking dish. Roll the enchiladas and place seam side down in the baking dish. Top with enchilada sauce.

Sprinkle with cheese. Cover and bake for 10 minutes. Remove cover and bake for 13 more minutes. If desired, broil at 450° for 1-2 minutes to brown the top more. Garnish with cilantro and serve with sour cream!
Make Ahead Method
- Refrigerate: Assemble the enchiladas as outlined, but don’t add the enchilada sauce or final layer of shredded cheese until ready to bake. Cover tightly and refrigerate for up to 2 days.
- When Ready to Bake: Add the enchilada sauce and cheese. Cover with foil and bake for 30 minutes. Remove the foil and bake for another 15 minutes, until hot and bubbly. Optional: Broil at 450°F for 1–2 minutes for a golden, bubbly cheese topping.
- Baking From Frozen: Assemble and freeze the enchiladas without the final layer of sauce and cheese. When ready to bake, add the sauce and cheese, cover tightly with foil, and bake for approximately 1 hour. Remove the foil and bake for another 15 minutes, or until heated through and bubbly.
Pro Tips
- Tortillas: I prefer 8-inch flour tortillas because they’re easy to roll and hold their shape well. Corn tortillas can also be used, although they’re more delicate and should be warmed before rolling to prevent tearing.
- Enchilada Sauce: My Homemade Enchilada Sauce adds incredible flavor, but store-bought sauce works too! You can also stir up to ¼ cup of heavy cream or half-and-half into the sauce for a slightly richer finish.
- Cheese: I love using a combination of Monterey Jack and cheddar. Shred the cheese from a block for the best flavor and melting consistency. Packaged Mexican cheese blends can also be used.
- Ground Beef: Drain excess grease after browning the beef so the filling isn’t overly greasy. The beef gets plenty of flavor from the seasoned sauce mixture!
- Rolling the Enchiladas: Spoon the filling onto the lower third of each tortilla, sprinkle with cheese, and roll tightly. Arrange seam-side down in the baking dish to help them stay closed.
- Extra Filling: This recipe makes enough filling for 10 enchiladas. If your baking dish only fits 8, refrigerate or freeze the remaining filling for tacos or another easy meal!
- Toppings: Sour cream, diced avocado, guacamole, salsa, green onions, diced tomatoes, and cilantro are all delicious additions!
- Tortillas:I like to use 8-inch flour tortillas as they’re easy to roll and stay in place vs. corn tortillas, but you can use corn as well. I microwave them just before rolling to make them more pliable.
- This filling makes enough for 10 tortillas. If your casserole dish can only fit 8, you can refrigerate or freeze leftover filling for easy tacos another day!
Frequently Asked Questions
Can I use corn tortillas instead of flour?
- Yes! I prefer flour tortillas because they’re easier to roll and hold their shape well, but corn tortillas can also be used. Warm them before assembling to make them more pliable and prevent cracking.
Can I use store-bought enchilada sauce?
- Absolutely! I love the flavor of my homemade enchilada sauce, but store-bought red enchilada sauce is a convenient alternative.
How do I keep beef enchiladas from getting soggy?
- Avoid adding too much sauce inside the tortillas and assemble the enchiladas just before baking when possible. If making them ahead of time, wait to add the enchilada sauce and shredded cheese until you’re ready to bake.
Can beef enchiladas be frozen?
- Yes! These enchiladas freeze well for up to 3 months. Assemble them without the final layer of sauce and cheese, cover tightly, and freeze. Add the toppings before baking, following the make-ahead instructions.
What to Serve with Beef Enchiladas
These are so delicious with all of your favorite toppings, especially sour cream, diced avocado, and fresh cilantro!
- For a complete meal, serve them with Homemade Salsa, Guacamole, Homemade Tortilla Chips, Mexican Street Corn Salad, Bean Dip, White Queso Dip, Nacho Cheese Sauce, or Nachos!
- You can also try my Burrito Bowls, Steak Fajitas, Chicken Quesadillas for more family favorites!
- Check out all of my Mexican-inspired recipes!
Storage
- Refrigerator: Store leftover Beef Enchiladas in an airtight container in the refrigerator for 3–4 days.
- Freezer: Freeze leftovers in an airtight, freezer-safe container for up to 3 months. For the best results, thaw overnight in the refrigerator before reheating.
- Reheating: Cover with foil and reheat in a 350°F oven until heated through. You can also microwave individual portions. Add a little extra enchilada sauce if needed to keep them from drying out.

Tools For This Recipe
(Amazon affiliate links*)- Check out all of my kitchen essentials here.
- 9 x 13-inch casserole dish– This one is perfect for enchiladas (I have this dish and love it!)
- Spice Rack– This is the one I have, it’s a snap to measure out your seasonings quickly and easily. (Big time saver.)
- Measuring Spoons–These magnetic ones stay nice and organized in my utensil drawer.
- Box cheese grater – I always shred cheese from a block in my recipes. It melts and tastes better than packaged shredded cheese.
*As an Amazon Associate, I earn from qualifying purchases.
Try These Next
-

- Homemade Salsa
-

- Burrito Casserole
-
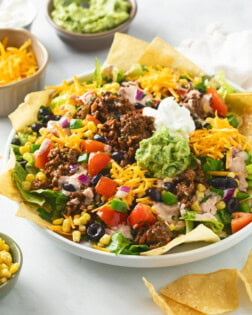
- Taco Salad
-
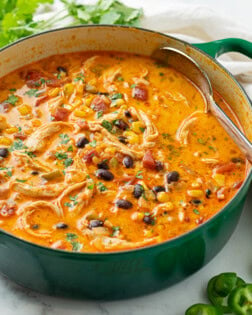
- Chicken Enchilada Soup
-
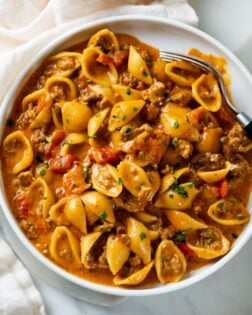
- Taco Pasta (One Pot!)
-

- Velveeta Queso
Get My Free E-Book!
- I’ve got a FREE e-Book with 7 super popular dinner recipes! Join my email list for your free recipe e-book and I’ll send your e-Book right over!
- And be sure to follow me on Instagram, Pinterest, & Facebook!
Tried This Recipe?
Leave a review, I love hearing your feedback! ⭐⭐⭐⭐⭐

Beef Enchiladas
Ingredients
Sauce (for the Beef)
- ½ cup beef broth
- 2 tablespoons lime juice
- 1 teaspoon hot sauce
- 1 teaspoon honey
- ½ teaspoon EACH: onion powder, garlic powder, cumin, paprika, dried oregano, chili powder
- 2 ½ teaspoons cornstarch
Enchiladas
- 1 lb. ground beef
- salt, to taste
- 1 small yellow onion, diced
- 15 oz. enchilada sauce
- 3 cloves garlic, minced
- 1 (15 oz.) can black beans, drained and rinsed
- 1 (4 oz.) can diced green chiles, undrained
- 2 tablespoons finely chopped cilantro, plus more to garnish
- 10 (8-inch) flour tortillas
- 3 cups shredded Mexican cheese, divided
Instructions
- Preheat oven to 350° F.
- Combine the sauce ingredients for the beef and set aside. Measure out remaining ingredients before beginning. (Make sure the liquid is at room temp when the cornstarch is added to ensure you don't activate it.)
- Season the ground beef with salt. Heat a wide skillet over medium-high heat. Add the beef and the onions. Cook for 8 minutes or until just cooked through, using a spatula to break apart the meat as it cooks. Drain grease well.
- Set the heat to medium and add 1/3 cup of the enchilada sauce and the garlic and cook for 1 minute.
- Add the combined sauce mixture (from step 2) and stir to combine. Bring to a boil and cook until thickened and reduced, about 1 minute. Reduce heat to medium and cook for 1 more minute to reduce the liquid more.
- Add the black beans, green chilis, and cilantro, and toss to combine. Heat through for 2 minutes, then remove from heat.
- Lightly grease a 9 x 13-inch casserole dish. Spread 1/3 cup of enchilada sauce on the bottom.
- Optional: Microwave 4 tortillas at a time for 30 seconds to make them more pliable.
- Spoon about ½ cup of filling on the bottom third of each tortilla and top with a heaping tablespoon of cheese. Roll tightly and place seam-side-down in the casserole dish.
- Spread enchilada sauce over the top, up to 1 cup. Sprinkle with an even layer of cheese.
- Cover and bake for 10 minutes. (If topping with foil, spray the bottom with nonstick cooking spray to prevent the cheese from sticking to it.)
- Remove cover and bake for 13 more minutes. Broil on low (450) for 1-2 minutes to brown the top slightly if desired. Watch it closely during this time.
- Garnish with cilantro and desired toppings (see notes for suggestions) and serve with sour cream!
Notes
- Tortillas: I prefer 8-inch flour tortillas because they're easy to roll and hold their shape well. Corn tortillas can also be used, but warm them first to prevent tearing.
- Enchilada Sauce: My Homemade Enchilada Sauce adds incredible flavor, but store-bought sauce works too! You can also stir in up to ¼ cup of heavy cream or half-and-half for a richer finish.
- Cheese: I love using a combination of Monterey Jack and cheddar. Shred the cheese from a block for the best flavor and melting consistency. Packaged Mexican cheese blends can also be used.
- Ground Beef: Drain excess grease after browning the beef. The seasoned sauce mixture adds plenty of flavor to the filling!
- Rolling the Enchiladas: Spoon the filling onto the lower third of each tortilla, sprinkle with cheese, and roll tightly. Arrange seam-side down in the baking dish to help them stay closed.
- Extra Filling: This recipe makes enough filling for 10 enchiladas. If your baking dish only fits 8, refrigerate or freeze the remaining filling for another meal.
Make-Ahead Method
- Refrigerate: Assemble the enchiladas as outlined, but don't add the enchilada sauce or final layer of shredded cheese until ready to bake. Cover tightly and refrigerate for up to 2 days.
- When Ready to Bake: Add the enchilada sauce and cheese. Cover with foil and bake for 30 minutes. Remove the foil and bake for another 15 minutes, until hot and bubbly. Optional: Broil at 450°F for 1–2 minutes for a golden, bubbly cheese topping.
- Baking From Frozen: Assemble and freeze the enchiladas without the final layer of sauce and cheese. When ready to bake, add the sauce and cheese, cover tightly with foil, and bake for approximately 1 hour. Remove the foil and bake for another 15 minutes, or until heated through and bubbly. (A temp of 165°F in the center is also an indication that they are ready.)
Storage
- Storage: Refrigerate leftovers in an airtight container for 3–4 days or freeze for up to 3 months. Thaw overnight in the refrigerator and reheat in a covered baking dish at 350°F until heated through, or microwave individual portions.
Nutritional information is an estimate and is per enchilada. This recipe makes 10 enchiladas.


Wow! “The best enchiladas I’ve ever had” said my husband. This recipe is the bomb and glad I went the extra mile to make the homemade enchilada sauce! I will never buy the can again 😊
That is AMAZING!!!! I’m so thrilled that it was a big hit, nice work going the extra mile with the homemade enchilada sauce Lindsay! You’re the best, thank you so much for the review!!
They are easy to freeze or easy to take over ready to have someone pop into the oven. This recipe blew me away and I get soooo many compliments on it whenever I make it for someone. I most recently made it for an aunt recovering from surgery. She looooves Mexican food and so she is a tough critic (LOL in my mind) and she said these were the best enchiladas she has ever had.
I am considering making these for our annual family girls trip. I do have one aunt that can’t have any gluten, so once again your pro tips come in handy so much because I can make a pan with corn tortillas for her.
I am SOOOO happy that these have been such a major hit, what a MASSIVE compliment from your aunt!! (And SO nice of you to make it for her while she was down and out!) I think this would be the BEST thing to make for your girls trip, who doesn’t love Mexican food?! Once again, your kind words made my day- I’m so thankful for you and so glad that you’re loving the recipes! THANK YOU from the bottom of my cozy-cooking heart! ❤️❤️❤️ 🙂 XOXO, -Stephanie
This was a really great recipe. I used mozzarella cheese instead of mexican cheese and it worked really well. thank you for the recipe, my sister says she wants it as her birthday dinner! (my sister commented as the name “sorry not telling…”) I will definitely use this recipe again!
Hey Leland!! I am PSYCHED that you and your sister loved this recipe and that she even wants it for her birthday dinner!! You made my day- thank you SO much for the review, and thank her for me too!! 🙂 You two are the best!
Yum! The recipe is pretty good!
I’m so glad that you enjoyed it! Thank you!
Hi Stephane, Do you cook the enchaladas before freezing and how do you cover them? Thank you. Billie
Hi Billie! If you’re looking to make the whole batch and freeze it all for another time, you don’t need to bake it first. I cover them with a few layers of thick foil. Here are more detailed instructions!
Make Ahead Method:
-Assemble as outlined but don’t add enchilada sauce or top with cheese until ready to bake.
-Freeze for up to 3 months. You can bake right from frozen. Cover and bake for 20 minutes. Remove cover and bake for 25 more minutes. (Optional: Broil at 450 for 1-2 more minutes.)
Just perfect!! So much flavor. I appreciate the recipe for the enchilada sauce. That made the difference , so much flavor. I find the canned sauce not very good. So thank you for that! It is definitely delicious! I did add some corn just because I like corn with Mexican recipes. Thank you! I always ck out your recipes before I do my grocery shopping. So I can plan your recipes! Thank you Stephanie
I’m sooo happy that you loved the enchiladas AND the homemade sauce! I agree, homemade doesn’t compare to a can! 🙂 Thank you so much for the review, I appreciate you so much!
This was delicious. My husband loved it!!!
I’m so happy to hear that Sylvia!! Thanks so much for the review!!💖
When preparing with the make ahead method, would you still put the enchilada sauce on the bottom of the pan before storing in the fridge overnight? Or omit that until the next day?
Hi Cam! I would omit the sauce until the next day. ☺️
My son just turned 21, and requested beef enchiladas for his special birthday dinner- so of course I had to make your recipe Stephanie! These were SO GOOD! Easy and incredibly flavorful. I served with rice and guacamole, and he was so very happy with his birthday dinner. Thank you so much Stephanie, we loved this and will definitely make this again ❤️
AWWWWW!!! I am so happy that this was a hit for your son’s birthday dinner!! Thank you so much for trusting my recipe for such a special occasion, you made my day!! Thank you Jenny- and happy birthday to your son from ME! 🙂
I made this for dinner one night. My husband loved it. I have your cook book didn’t find it in there thank goodness I have email coming in. If you come out with more cook books let me know please.
I’m so happy that you enjoyed it Suzanne! I have added you to my list of people to email when pre-orders open for cookbook #2 which will be out later this year! These Beef Enchiladas came out after the second book was already being edited, so they won’t be in it, but another set of 100+ super popular recipes will be! 🙂
That’s great another cook book. I can’t wait ❤️ keep up the great work. I cook more and my family loves it. Thanks ❤️ oh and Amazon is great for my cooking needs
Thanks so much for your support Suzanne! I can’t wait for the book to come out!❤️