 The Cozy Cookbook is here!
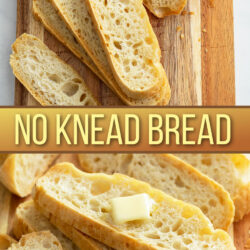
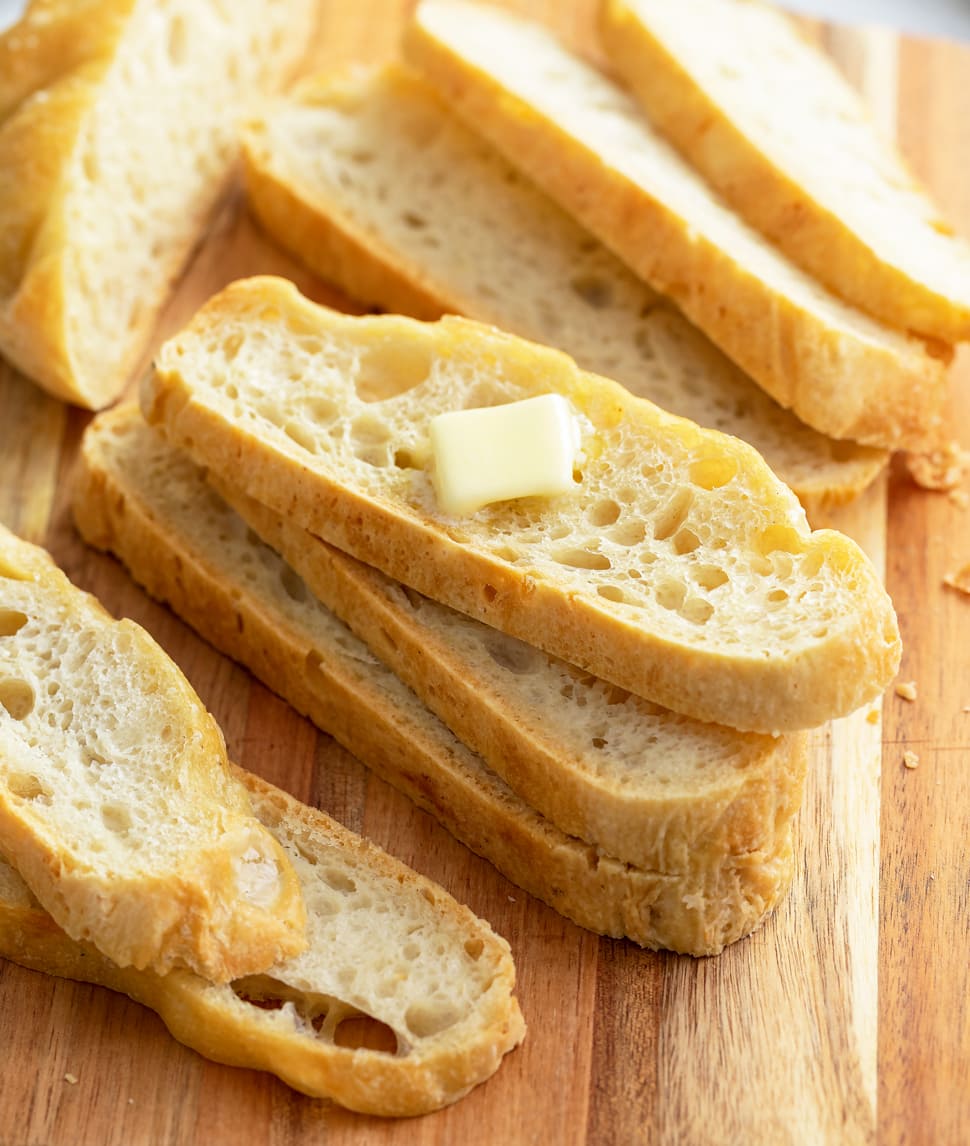
This light and airy no-knead bread recipe is easy to make with or without a Dutch oven! The dough requires minimal handling, with bread that’s crusty on the outside and soft and chewy on the inside!
This is the best bread to serve with soups, dips, pastas, and sandwiches!

No Knead Bread
If there is one bread recipe that you learn how to make in life, it should be this one. You don’t even have to knead the dough! You don’t even have to touch the dough! (In fact, it’s easier to let the silicone spatula do the handling here.)
There are so many up-sides to this recipe. It’s super forgiving, it freezes well to serve with breakfast, lunch, and dinner on a whim, it’s light and airy, and it goes with everything!
I love making this to serve with my favorite soups, pastas, pizza dip, and it makes the best grilled cheese sandwiches!
Don’t miss my PRO tips below, they’re everything.
How to Make It
See recipe card below this post for ingredient quantities and full instructions.
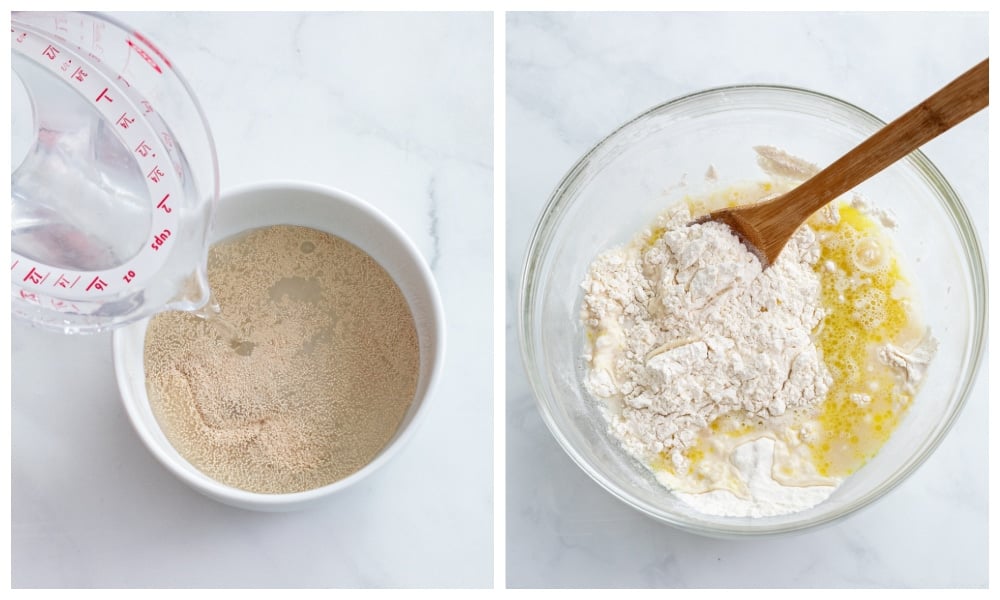
Combine yeast, sugar, and slightly warm water and cover with saran wrap for 5 minutes. Then combine with flour and oil to form a wet dough.
 Spray with nonstick cooking spray. Cover with saran wrap and then with a dish towel and place in a warm place to rise for 2-3 hours, until at least doubled in size.

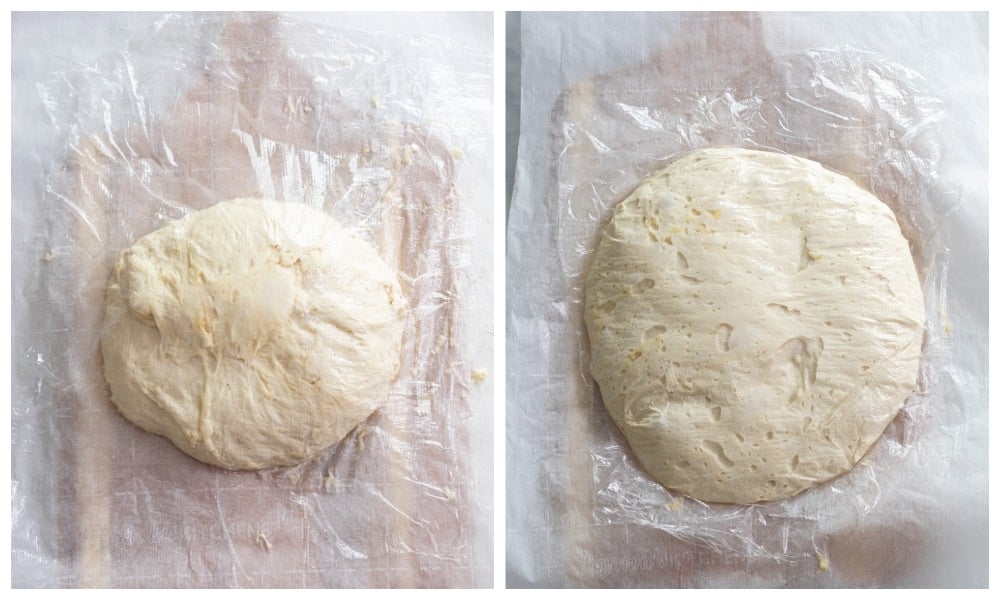
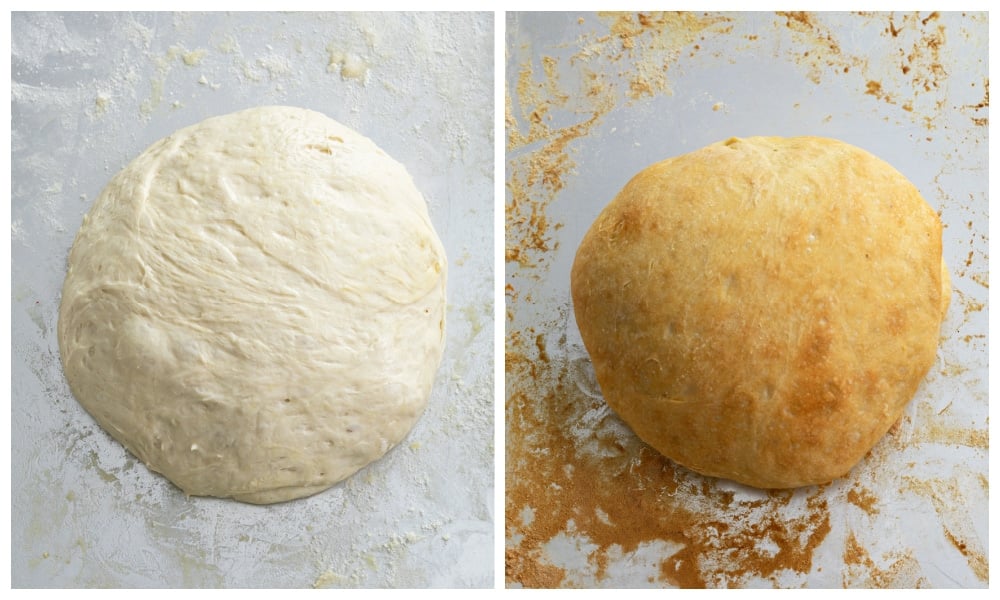
Tilt the bowl and use a silicone spatula to gently slide the dough onto floured parchment paper (or a floured baking sheet if not using Dutch oven.) Fold the dough onto itself to form a ball. Spray with nonstick cooking spray and cover loosely with saran wrap while you preheat the oven and allow the dough to rest/rise for 45 minutes. Place the Dutch oven into the oven while it pre-heats, if using.
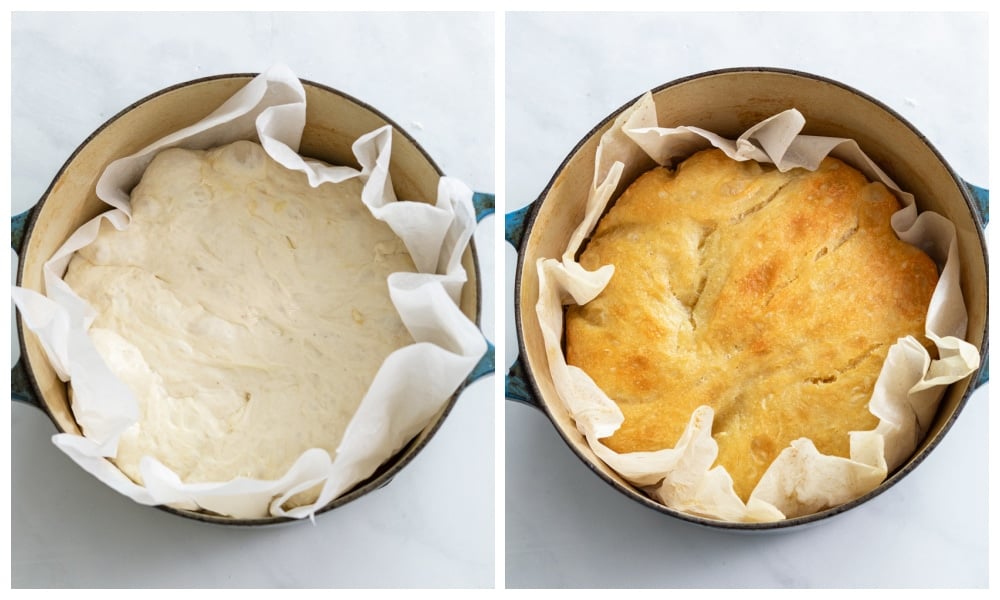
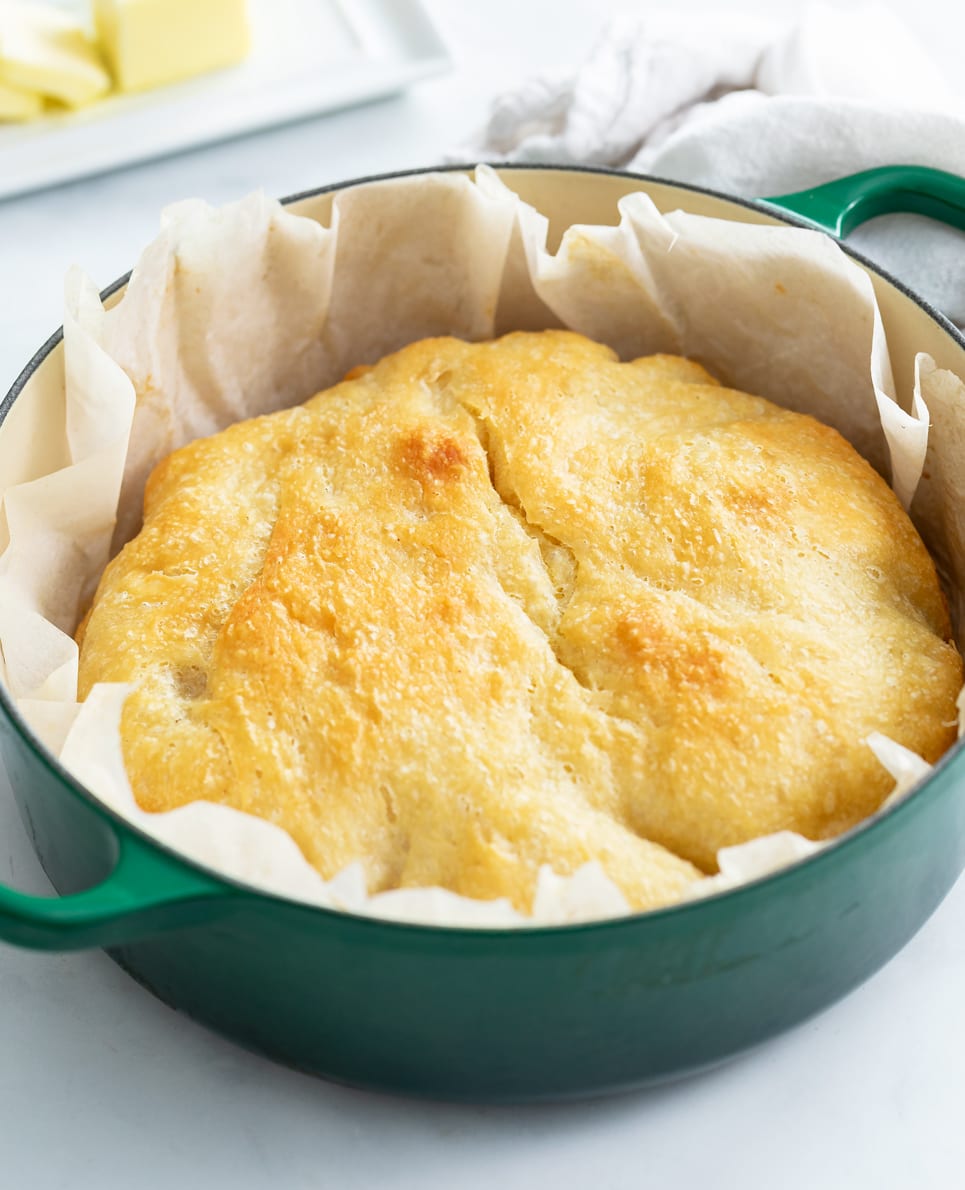
Remove saran wrap from the dough. Lift the parchment paper and carefully transfer the dough into the preheated Dutch oven. Cover and bake at 425 °F for 40 minutes. Remove cover and brush with butter. Bake for 10-12 more minutes, until browned.
If not using a Dutch oven, remove saran wrap and place the baking sheet in the preheated oven. Bake at 475° for 25 minutes. Brush with butter and bake for 5 more minutes, or until golden brown.
If Your Dough Isn’t Rising
A warm, moist environment is needed for dough to activate and rise. If you need a little boost of warm air, try these tricks:
- Oven: This trick works great! Heat your oven to 200° for 2 minutes, then shut the heat off. Cover the bowl of dough with a dish towel (no plastic wrap in the oven), and shut the door to trap the warm air inside. Let it rise!
- Microwave: Fill a glass measuring cup with 1 cup of water and microwave for 2 minutes, until boiling. Remove the water and replace it with your covered bowl of dough. Close the door right away. The residual heat will allow your dough to rise.
- Warm Dish Towel: Place a kitchen towel in the dryer until it’s nice and warm, place it over the saran wrap on top of the bowl and let it hang over the sides. Repeat as needed.
- Outside: If it’s warm outside, place your dough outside to rise! (Even better if it’s a little humid.)
Baking Temperature
- Dutch Oven Method
- Most parchment paper is oven safe to 425°, so if you’re using the Dutch oven method with parchment paper, I recommend baking at that temperature.
- I don’t recommend not using parchment paper, the dough “sizzles” when it hits the Dutch oven without a layer of protection, since the Dutch oven needs to be preheated before baking to ensure a crispy crust.
- Baking Sheet Method
- I recommend baking at 475° so that the dough sets more quickly and holds it’s shape, since there is no vessel to hold it. I also like to place a cast iron skillet on the bottom rack with water in it to create steam, which helps create a crusty outside.
Dutch Oven vs. No Dutch Oven
- I have tested this recipe with and without a Dutch oven. My preferred method is to use a Dutch oven, as it definitely results in a crispier outer crust. (I use a 3.5 quart but varying sizes are okay.) That said, the baking sheet method produces a great end result as well. You can also use a cast iron skillet.
Make Ahead Method
- Let the dough rise once for 2-3 hours as outlined. Transfer the covered dough to the fridge for up to 3 days. This will actually give it more flavor than baking right away.
- Remove from the fridge and proceed with forming it and letting it rest/rise while you preheat the oven for baking.
- Since this dough is super airy and delicate, (unlike pizza dough), I don’t recommend freezing the dough. I would instead freeze the baked bread.
Pro Tips
- Saran wrap traps in moisture and creates a humid environment, perfect for rising. If you don’t have it on hand, place your dough in a greased plastic container with a tight fitting lid to rise in.
- Flour: Be sure to weigh your flour to ensure that you don’t add too much. Bread flour is best in this recipe, but all-purpose can be used if needed. This recipe uses minimal flour, which makes the end result so light and airy. (I’ve used as little as 2 + 3/4 cups before and it’s been great!)
- Yeast: Instant yeast is great for this recipe, but Active and Rapid Rise yeast are fine as well. These photos are actually from using active dry yeast.)
- Salt: Non-iodized salt is best for baking. (Table salt is generally supplemented with iodine, which can generate a bitter taste in baked goods.) I use Redmond Real Salt for all of my baking and cooking recipes. (Enter code ‘COZY‘ for 15% off!) Of course, table salt can be used if that’s what you have on hand.
- Parchment Paper: Crumple it up first so that it better molds to the shape of the Dutch oven, if using that method.
- High Altitudes: Baking at a high altitude typically requires adjustments, see this guide from Bob’s Red Mill on what adjustments may be needed for this recipe.
- My key advice: Handle the dough gently and minimally to keep the airy holes intact. Use a silicone spatula to work with the dough, not your hands. Less is more with the flour. Give the dough sufficient opportunity to rise, (twice).
Storage
- Store in a covered container at room temperature for 5 days, refrigerate for up to 10 days, or freeze for up to 3 months.
- This bread can be frozen as a whole loaf or in slices. I like to freeze sliced up loaves in a gallon freezer bag, it’s easy to grab for breakfast, lunch, and dinner during the week! Be sure to seal out the air.
- This bread can be sliced lengthwise if being used for sandwiches, or slice it vertically for toast or serving with soups and dips!
Tools For This Recipe
(Amazon affiliate links)- Check out all of my kitchen essentials here.
- Kitchen Scale– I like to place my mixing bowl on this scale, clear the weight, and then scoop the flour right in. No mess, no muss, no fuss! (Weighing the flour is everything and eliminates any guess work.)
- Mixing Bowls– These 3 sizes are perfect for baking.
- OXO Pop Container– I love storing my flour in here!
- 3.5 Quart Enamel Cast Iron Dutch Oven
- Bread Lame– To easily score the top of your bread if desired.
- Bread Knife & Cutting Board– For nice clean cuts.
What to Serve With No-Knead Bread
See all of my Soup recipes here!
-

- Broccoli Cheese Soup
-

- Zuppa Toscana Soup
-

- BEST Tomato Soup
-

- Meatball Soup
-

- Beer Cheese Soup
-

- Minestrone Soup
Get My Free Meal Plan
I’ve got a Free Meal Plan with 7 of my super popular recipes (complete with grocery list)! Sign up for my email list and I’ll send it over now along with weekly dinner recipes!
And follow me on Facebook, Instagram, and Pinterest!
Tried This Recipe?
Leave a review, I love hearing your feedback! ⭐⭐⭐⭐⭐
No Knead Bread
Ingredients
- 2 teaspoons instant yeast, active or rapid rise will work as well.
- 2 teaspoons sugar
- 1 ½ cups barely warm water, 100° F
- 3 cups bread flour, 360 grams
- 2 teaspoons salt, see notes
- 1 tablespoon olive oil
- 1 tablespoon butter
Instructions
- See notes for making this without a Dutch oven.
- Note: The dough in this recipe is sticky, gently handle with a silicone spatula throughout this process. (Not your hands.)
- Combine the yeast, sugar, and water in a small bowl. Cover with saran wrap and let sit for 5 minutes.
- Combine the flour and salt and stir to combine. Add the olive oil and water/yeast mixture and use a silicone spatula to combine until all of the flour is moist. The dough will be sticky.
- Roughly shape into a ball and be sure to spray the top with cooking spray. Cover with saran wrap, and then with a dish towel. Let rise for 2-3 hours, until at least doubled in size. See notes for rising tips.
- Optional step after rising: Transfer to the fridge for up to 3 days to develop more flavor. It will rise more, and may eventually deflate slightly, but that’s okay. After refrigerating, proceed with the steps below.
- Use a silicone spatula to scrape the dough out of the bowl and turn it onto a sheet of floured parchment paper. Use a silicone spatula to fold the dough onto itself, by taking the outer edges and folding them into the middle, until a sturdier ball is formed. Spray with nonstick cooking spray, and cover loosely with saran wrap. Let it rest/rise for 45 minutes while you preheat the oven.
- Preheat the oven to 425° F and place the Dutch oven inside, uncovered. (Verify that this is an acceptable practice with your brand of Dutch oven, some advise against preheating it with nothing inside.)
- Remove the saran wrap from the dough. Using oven mitts, remove the Dutch oven from the oven. Lift the parchment paper and carefully lower the parchment paper and dough into the Dutch oven. Close the lid right away and transfer it to the oven.
- Bake for 40 minutes. Remove it from the oven and use a pastry brush to distribute 1 tablespoon of butter over the top, until melted. This will help it achieve a golden-brown color.
- Return it to the oven, uncovered, and bake for 10-12 minutes, or until golden brown on top.
- Allow the bread to cool for at least 5 minutes before slicing in.
Notes
- Follow the recipe as outlined through step 5.
- Use a silicone spatula to scrape the dough out of the bowl and turn it onto a lightly floured nonstick baking sheet or cast-iron skillet.
- Use the spatula to fold the dough onto itself by taking the outer edges and folding them into the middle, until a sturdier ball is formed. Spray with nonstick cooking spray and cover loosely with saran wrap. Let it rise for 45 minutes. Gently reshape the ball with the spatula if it becomes too flat after rising.
- Bake at 475° F (not 425° as outlined for Dutch oven method), for 25 minutes, or until the top begins to brown. Remove from the oven and brush with butter. Bake for another 5 minutes, or until the top is lightly golden brown.
- Pro Tip: Place 1.5 cups of water in a shallow pan or cast iron skillet on the bottom oven rack when you preheat the oven for baking. Leave it there while the bread bakes. This will create steam, resulting in a crispier outer crust. (This is to replicate the steam that is created when baked in a covered Dutch oven.)
If Your Dough Isn't Rising: If you need a little boost of warm air, try these tricks:
- Oven: This trick works great! While your yeast is sitting in the warm water, heat your oven to 200° for 2 minutes, then shut the heat off. Place your covered bowl of dough in the oven and shut the door to trap the warm air inside. Let it rise!
- Microwave: Fill a glass measuring cup with 1 cup of water and microwave for 2 minutes, until boiling. Remove the water and replace it with your covered bowl of dough. Close the door right away. The residual heat will allow your dough to rise.
- Warm Dish Towel: Place a kitchen towel in the dryer until it's nice and warm, place it over the saran wrap on top of the bowl and let it hang over the sides. Repeat as needed.
- Outside: If it's warm outside, place your dough outside to rise! (Even better if it's a little humid.)
Pro Tips:
- Saran wrap traps in moisture and creates a humid environment, perfect for rising. If you don't have it on hand, place your dough in a greased plastic container with a tight fitting lid to rise in.
- Flour: Be sure to weigh your flour to ensure that you don't add too much. Bread flour is best in this recipe, but all-purpose can be used if needed. This recipe uses minimal flour, which makes the end result so light and airy.
- Yeast: Instant yeast is great for this recipe, but Active and Rapid Rise yeast are fine as well. (Photos are actually from using active yeast.)
- Salt: Non-iodized salt is best for baking. (Table salt is generally supplemented with iodine, which can generate a bitter taste in baked goods.) I use Redmond Real Salt for all of my baking and cooking recipes. (Enter code 'COZY' for 15% off!) Of course, table salt can definitely be used if that's what you have on hand.
- Parchment Paper: Crumple it up first so that it better molds to the shape of the Dutch oven, if using that method.
- High Altitudes: Baking at a high altitude typically requires adjustments, see this guide from Bob's Red Mill on what adjustments may be needed for this recipe.
- My key advice: Handle the dough gently and minimally to keep the airy holes intact. Use a silicone spatula, not your hands. Less is more with the flour. Give the dough sufficient opportunity to rise, (twice).
- See blog post for: Make-ahead method, info on baking temperatures, and my preference of Dutch oven vs. non Dutch oven.
Storage
- Store in a covered container at room temperature for 5 days, refrigerate for up to 10 days, or freeze for up to 3 months.
- This bread can be frozen as a whole loaf or in slices. I like to freeze sliced up loaves in a gallon freezer bag, it's easy to grab for breakfast, lunch, and dinner during the week! Be sure to seal out the air.


Sooooo. I went to the store and bought some bread flour bc all I’d had was all purpose and I can already tell a difference. I have it sitting now to rise before it goes in the oven and it’s made a huge difference. So just fyi if anyone wants to substitute all purpose flour for bread flour DO NOT it makes a difference. Thanks again for sharing your recipes I know it’s gonna turn out great!!!!
Yes, bread flour is definitely key Lacy! I’m so happy it looks like you’re on the right track with this. Thanks so much for taking the time to leave a review!❤️
I made this today used my Dutch oven. Followed the recipe to a T. When I got to the part of putting the dough in the parchment paper it was seemed to have more liquid to it. I let it rise and all. In your video yours was more round as it rose as mine was just flat. I did end up adding more flour bc there was no way I could cook it how it was. You couldn’t form it at all it was so sticky. I didn’t cover it when I baked it either so that didn’t help. But if you have any tips for when it is like that I’d love to learn them. On a wonderful note the family loved it. It still tasted very good a little thicker and more dense and crunchier outside (probably from me not baking with the lid). Very good flavor. We did have a terrible storm come through and the air is much more humid than usual. This is my 2nd time making any type of bread. Done pita bread a few times it was great. Anyways, thanks for sharing I make many of your recipes and would love to learn any tips you could share!!! Thanks for sharing my your recipes!!!
Hi Lacy!! One trick to try on a humid day would be to use 3/4 of the amount of liquid that the recipe calls for since there is so much more additional moisture in the air, then add more liquid if/as needed, one tablespoon at a time, until your desired consistency is reached. I’m thinking that the excess liquid is why you had to add more flour, which caused it to be more dense. Baking is definitely tricker on off-weather days! ❤️ I appreciate you providing enough information for me to help troubleshoot!