

 Get my Cookbooks!
Baked Mac and Cheese

This Baked Mac and Cheese recipe has tender macaroni coated in a rich, creamy cheese sauce made with cheddar, Gruyère, and Gouda. It’s topped with even more cheese and baked to perfection! Perfect for holidays, potlucks, and family dinners!
Be sure to check out all of my Mac and Cheese recipes!

Baked Mac and Cheese
There’s nothing quite like a casserole dish filled with creamy, cheesy Baked Macaroni and Cheese! This recipe has an abundance of rich, flavorful sauce, so every bite stays wonderfully creamy, even after baking. (The macaroni absorbs a surprising amount of sauce in the oven, and I promise that this recipe accounts for that!)
I love the combination of sharp cheddar, Gruyère, and Gouda. Each cheese brings something special to the sauce, creating the perfect balance of flavor and creaminess. You can also customize the cheese combination to suit your taste!
This is one of my favorite side dishes for holidays and family gatherings, and it’s make-ahead friendly, which is always a bonus. Don’t miss my Pro Tips below for the best results!
How to Make It
See recipe card below this post for ingredient quantities and full instructions.
Melt the butter in a large pot over medium heat. Add the flour and stir continuously for 2 minutes. Gradually add the milk and heavy cream in small splashes, stirring continuously until smooth. Let the sauce heat through and thicken for about 5 minutes. Stir in the seasonings and hot sauce, then remove from heat.

Gradually sprinkle in 4 cups of shredded cheese, stirring until completely melted and smooth. Meanwhile, boil the macaroni until just shy of al dente (about 1 minute less than the package instructions).
Want to save this recipe?

Drain the macaroni and add it to the cheese sauce. Stir gently until well combined, then transfer to a lightly greased 9 x 13-inch casserole dish.

Top with the remaining 2 cups of shredded cheese. Bake uncovered at 325°F for 25 minutes, until the cheese is melted and the casserole is heated through. Broil for a few minutes at the end if you’d like a lightly golden topping. Serve warm!

Make Ahead Method
- Use slightly less pasta: If making this ahead of time, I recommend using a little less than the full pound of macaroni. The pasta will continue absorbing sauce as it sits, so this helps ensure there’s plenty of creamy cheese sauce after baking.
- Undercook the pasta: Boil the macaroni for 1–2 minutes less than al dente. It will continue cooking in the oven.
- Assemble: Prepare the recipe as outlined, but don’t bake it. Let it cool, then cover tightly and refrigerate for up to 2 days or freeze for up to 3 months.
- Bake: If refrigerated, let it sit out for 30 minutes while the oven preheats. Bake at 325°F for 30–35 minutes, until heated through. The consistency won’t be quite as creamy as when it’s prepared and served immediately.
- If frozen: Thaw completely in the refrigerator before baking. Additional baking time may be needed if it’s still cold in the center.
Pro Tips
- Shred the cheese from a block. Freshly shredded cheese melts more smoothly than packaged shredded cheese, which contains anti-caking agents that can affect the consistency of the sauce.
- My favorite cheese combination is sharp cheddar, Gruyère, and Gouda. Cheddar provides classic mac and cheese flavor, Gruyère adds a slightly nutty richness, and Gouda melts beautifully. You can also experiment with Monterey Jack, Colby, and mozzarella!
- My favorite cheese brands: I use Cracker Barrel Cheddar, Yancey’s Fancy Gouda (regular, not smoked), and Emmi Gruyere cheese as well as Frank’s hot sauce.
- Keep the heat low when adding the cheese. Remove the sauce from the heat before gradually sprinkling in the shredded cheese. Excessive heat can cause the sauce to separate and become grainy.
- Don’t overcook the pasta. Boil the macaroni for 1 minute less than al dente. It will continue cooking in the oven, and slightly undercooking it helps prevent mushy results.
- The hot sauce and mustard powder are flavor enhancers. They bring out the flavor of the cheese without making the sauce spicy or giving it a noticeable mustard flavor.
- Optional additions include diced ham, bacon, caramelized onions, steamed broccoli, shredded chicken, or buffalo chicken.
- For a crunchy topping: Combine 1 cup of crushed Ritz crackers with 2 tablespoons of melted butter. Sprinkle over the macaroni during the last 15 minutes of baking for a buttery, golden topping.
- Don’t overbake. The macaroni continues absorbing the cheese sauce as it bakes. Remove it once the cheese is melted and the casserole is heated through to preserve that creamy consistency.
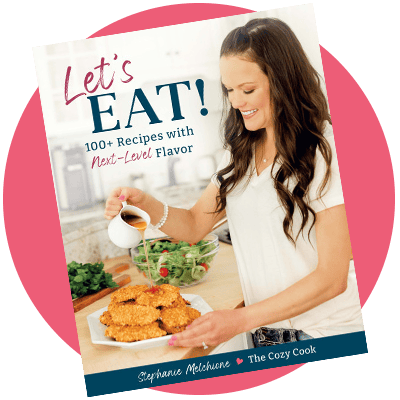
- 📘 Find this recipe on page 210 of my second cookbook, Let’s EAT!
Storage and Reheating
- Refrigerate: Store leftovers in an airtight container in the refrigerator for up to 3 days.
- Reheat: Warm individual portions in the microwave in short intervals, stirring gently between intervals. Add a splash of milk to help restore the creamy consistency. Larger portions can be reheated in a covered baking dish at 325°F until heated through.
- Freeze: You can freeze leftovers in an airtight container for up to 3 months, although the cheese sauce may separate slightly when thawed and reheated.
- For best results: Reheat gently and avoid overheating, which can cause the sauce to become oily or grainy. The macaroni will continue absorbing sauce during storage, so a little extra milk can make a big difference!
What to Serve With Mac and Cheese
This is a versatile side dish that pairs perfectly with so many family favorites! Here are a few of my favorite options:
- Meatloaf: Stuffing Meatloaf | Mini Meatloaf | Turkey Meatloaf | Copycat Cracker Barrel Meatloaf
- Chicken: Chicken Nuggets | Baked Chicken Tenders | Hot Honey Chicken | Fried Chicken Tenders | Country Fried Chicken
- Steak: Philly Cheesesteak | Steak Bites | Steak with Gravy | Cube Steak | Filet Mignon
- Salad: BEST Chicken Caesar Salad | Olive Garden Salad | Mango Salad | Big Mac Salad
- Bread: Texas Roadhouse Rolls | Dinner Rolls | Cheddar Bay Biscuits | Buttermilk Biscuits

Tools For This Recipe
(Amazon affiliate links)- Check out all of my kitchen essentials here.
- Deep Casserole Dish: I have this set in blue and in white, the larger one is the perfect size for large casseroles.
- Box Cheese Grater– Grating/Shredding cheese from a block will also give you the best flavor and consistency.
- Pasta Strainer– I have this one and love it.
- Measuring Spoons– I have these magnetic ones which stay nice and organized in my utensil drawer.
- Pinch Bowls– for measuring out seasonings ahead of time.
Try These Next
-

- Tuscan Mac and Cheese
-

- Chili Mac
-
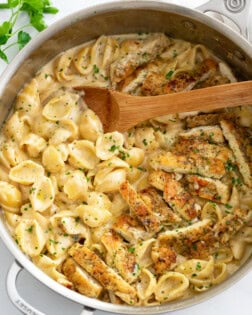
- Creamy Chicken Pasta
-

- Cajun Chicken
-
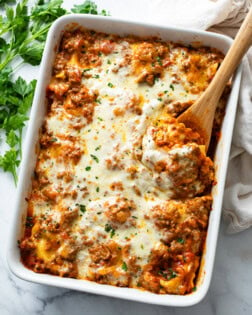
- Baked Ravioli
-

- Ground Beef Pasta
Get My Free E-Book!
- I’ve got a FREE e-Book with 7 super popular dinner recipes! Join my email list for your free recipe e-book and I’ll send your e-Book right over!
- And be sure to follow me on Instagram, Pinterest, & Facebook!
Tried This Recipe?
Leave a review, I love hearing your feedback! ⭐⭐⭐⭐⭐

Baked Mac and Cheese
Ingredients
- 1 lb. elbow macaroni
- 6 tablespoons butter
- 6 tablespoons flour
- 1 ½ cups heavy cream
- 2 ½ cups milk
- 1 teaspoon hot sauce
- 1 teaspoon mustard powder
- ½ teaspoon salt
- ¼ teaspoon each: onion powder, pepper
- 3 cups cheddar, shredded
- 2 cups Gruyere, shredded
- 1 cup Gouda, shredded
Instructions
- Preheat oven to 325° F. Measure out ingredients before beginning.
- Begin boiling pasta water for the macaroni while you prepare the cheese sauce. Salt the water once a boil is reached. (I use 1 tbsp. kosher salt.)
- Meanwhile, melt butter in a large pot over medium heat. Use a silicone spatula to stir in the flour. Continue to stir for 2 minutes, it should start to turn a light brown. Add the heavy cream/milk in small splashes, stirring continuously. (If you add it too quickly you’ll “break” the roux and the sauce will be thin.)
- Let it simmer, uncovered, while you boil the macaroni for 1 minute less than al dente (about 7 minutes, refer to package). Stir both the sauce and the macaroni periodically.
- Add the seasonings and hot sauce to the sauce. Remove from heat.
- Gradually sprinkle in 4 cups of shredded cheese. Stir continuously until smooth and combined. If it seems too thick, add a splash of milk.
- Drain the macaroni and add it to the warm pot you boiled it in. Pour the cheese sauce on top and stir to combine. Transfer to a lightly greased 9 x 13-inch casserole dish. Top with remaining 2 cups of cheese.
- Bake uncovered for 20 minutes. If desired, broil at 450° F for 2-3 minutes to brown the top. Serve!
Notes
- Shred the cheese from a block. Freshly shredded cheese melts more smoothly than packaged shredded cheese, which contains anti-caking agents that can affect the consistency of the sauce.
- My favorite cheese combination is sharp cheddar, Gruyère, and Gouda. Cheddar provides classic mac and cheese flavor, Gruyère adds a slightly nutty richness, and Gouda melts beautifully. You can also experiment with Monterey Jack, Colby, and mozzarella!
- My favorite cheese brands: I use Cracker Barrel Cheddar, Yancey’s Fancy Gouda (regular, not smoked), and Emmi Gruyere cheese as well as Frank’s hot sauce.
- Keep the heat low when adding the cheese. Remove the sauce from the heat before gradually sprinkling in the shredded cheese. Excessive heat can cause the sauce to separate and become grainy.
- Don't overcook the pasta. Boil the macaroni for 1 minute less than al dente. It will continue cooking in the oven, and slightly undercooking it helps prevent mushy results.
- The hot sauce and mustard powder are flavor enhancers. They bring out the flavor of the cheese without making the sauce spicy or giving it a noticeable mustard flavor.
- Optional additions include diced ham, bacon, caramelized onions, steamed broccoli, shredded chicken, or buffalo chicken.
- For a crunchy topping: Combine 1 cup of crushed Ritz crackers with 2 tablespoons of melted butter. Sprinkle over the macaroni during the last 15 minutes of baking for a buttery, golden topping.
- Don't overbake. The macaroni continues absorbing the cheese sauce as it bakes. Remove it once the cheese is melted and the casserole is heated through to preserve that creamy consistency.
- 📘 Find this recipe on page 210 of my second cookbook, Let's EAT!
Make-Ahead Method:
- Use slightly less pasta: If making this ahead of time, I recommend using a little less than the full pound of macaroni. The pasta will continue absorbing sauce as it sits, so this helps ensure there's plenty of creamy cheese sauce after baking.
- Undercook the pasta: Boil the macaroni for 1–2 minutes less than al dente. It will continue cooking in the oven.
- Assemble: Prepare the recipe as outlined, but don't bake it. Let it cool, then cover tightly and refrigerate for up to 2 days or freeze for up to 3 months.
- Bake: If refrigerated, let it sit out for 30 minutes while the oven preheats. Bake at 325°F for 30–35 minutes, until heated through. The consistency won't be quite as creamy as when it's prepared and served immediately.
- If frozen: Thaw completely in the refrigerator before baking. Additional baking time may be needed if it's still cold in the center.
Storage:
- Refrigerate: Store leftovers in an airtight container in the refrigerator for up to 3 days.
- Reheat: Warm individual portions in the microwave in short intervals, stirring gently between intervals. Add a splash of milk to help restore the creamy consistency. Larger portions can be reheated in a covered baking dish at 325°F until heated through.
- Freeze: You can freeze leftovers in an airtight container for up to 3 months, although the cheese sauce may separate slightly when thawed and reheated.
- For best results: Reheat gently and avoid overheating, which can cause the sauce to become oily or grainy. The macaroni will continue absorbing sauce during storage, so a little extra milk can make a big difference!
Nutritional information is per serving, this recipe makes 10 servings. Note that the nutritional information shared is an estimate.
Nutrition


Third recipe I tried from your site and all three have been amazing! Loved the taste of the sauce and the chicken seasonings / coating were so flavorful! I’m so glad I found your site and I can’t wait to try more recipes!
I’m so happy to have you hear Sharon! Thanks so much for the great review, I can’t wait for you to keep trying more recipes!😀
I wrote the review for the wrong recipe! I meant to write it for the Hot Honey Chicken!!! Sorry! But the mac & cheese was awesome, too!
I’m so happy you liked both Sharon, thanks so much for taking the time to leave a review!❤️
definitely going to be my go to recipe for mac n cheese
Excellent! I am sooo happy to hear that Sosha, thank you!
This is the BEST mac n cheese I’ve ever had! I doubled the recipe for Thanksgiving so there was a ton and it only lasted a second day! Even my picky youngest who stands by her Kraft, loved this! Thanks for sharing!!
I am soooo happy to hear that Tammy!! I appreciate you taking the time to leave a review, you made my day! Thank you! XOXOXO – Stephanie ❤️
Just made for my family tonight and they loved it!
I’m so happy it was such a success with the family Kathy! I love nailing down a good meal the whole family loves. Thanks so much for the review!💕
The perfect savory and thick Mac & cheese. I make this recipe every year for Thanksgiving / holidays and it is always a hit. I share it with all of my friends too!
I’m so happy you’ve been enjoying this one Mikayla! I love making it during the holidays. Great side for the adults and the kids love it! Thanks for the great review🩷
I have made this mac and cheese three years in a row and I’ve tweaked the recipe just a tad and I’ve found it helps. The original recipe is AMAZING too but I almost always have to add more seasoning (which I’m probably doing something wrong lol).
Anyways, I add 1/4 tsp of garlic powder and paprika. This year I added half of all the seasonings to the roux and then the other half after the cream thickened and IT HELPED SO MUCH. Every year I always have a hard time finding the cheese so I use extra sharp cheddar, Gouda, and pepper jack cheese (and take the hot sauce out). Changing the cheese is probably why I have to add seasoning. I just thought about that lol.
ALSO ALSO. I’m GF and making this recipe is SUPER easy. I use GF noodles and GF flour and it works amazingly. Thank you for this amazing recipe. It’s always the talk of the meal 🙂
Hi Demetria! Thank you for sharing your tips, I love seasoning, nicely done! 🙂
I forgot to rate it! It’s amazing
I tried this recipe for a Friendsgiving and I was soo nervous because it was my first time, but I followed the recipe to the letter and the pro tips were soo helpful and my friends ended up giving my 9 and 10 out of 10s for it! They loved it! Thank you!!
Nice work Tammy! Friendsgiving is so fun, I’m so happy this was enjoyed. Thanks so much for taking the time to leave a review!💖
Hi if using a block of cheddar cheese, is 12 ounces equal to 3 cups shredded or would it be 16 ounce block?
Hi Anna! When I measure cheese, I shred it and put it into a cup rather than going by ounces or blocks. When I measure what I’ve shredded and put into 1 cup, I get 2.5 ounces. (So 3 cups would be just under 8 ounces. 2 cups would be 5 ounces.) -I hope that helps!!
Best Mac-n-cheese ever!! My teenage son request this regularly and even wanted it for his special bday dinner 😊 My son even bought me your cookbook and we have loved all the recipes we have tried thus far ❤️
I am sooooo (soooooo!) happy to hear that Angie! I’m honored that your son bought you a cookbook too!! Thank you so much for your kind words and for the review, you made my day!! -Stephanie
The best Mac and cheese I’ve had EVER! I literally made this recipe 3 days in a row! I would just use 2 boxes of elbow macaroni which is what I did to begin with. The cheese sauce would’ve been too much for the pan I was using but went perfectly with TWO boxes of elbows.
Hi Kamaya!! I’m so happy that you love the mac and cheese! 🙂 I would caution others before using 2 lbs. of macaroni just because I feel like it would be really dry and hard to fit in a 9×13-inch casserole dish- but I’m thrilled that you love it and make it the way that you like it!
Sorry, I wasn’t using a 9×13 pan. I had the extra long aluminum disposable trays.
Gotcha!! 🙂 That makes sense!