 Get my Cookbooks!
 Mongolian Beef

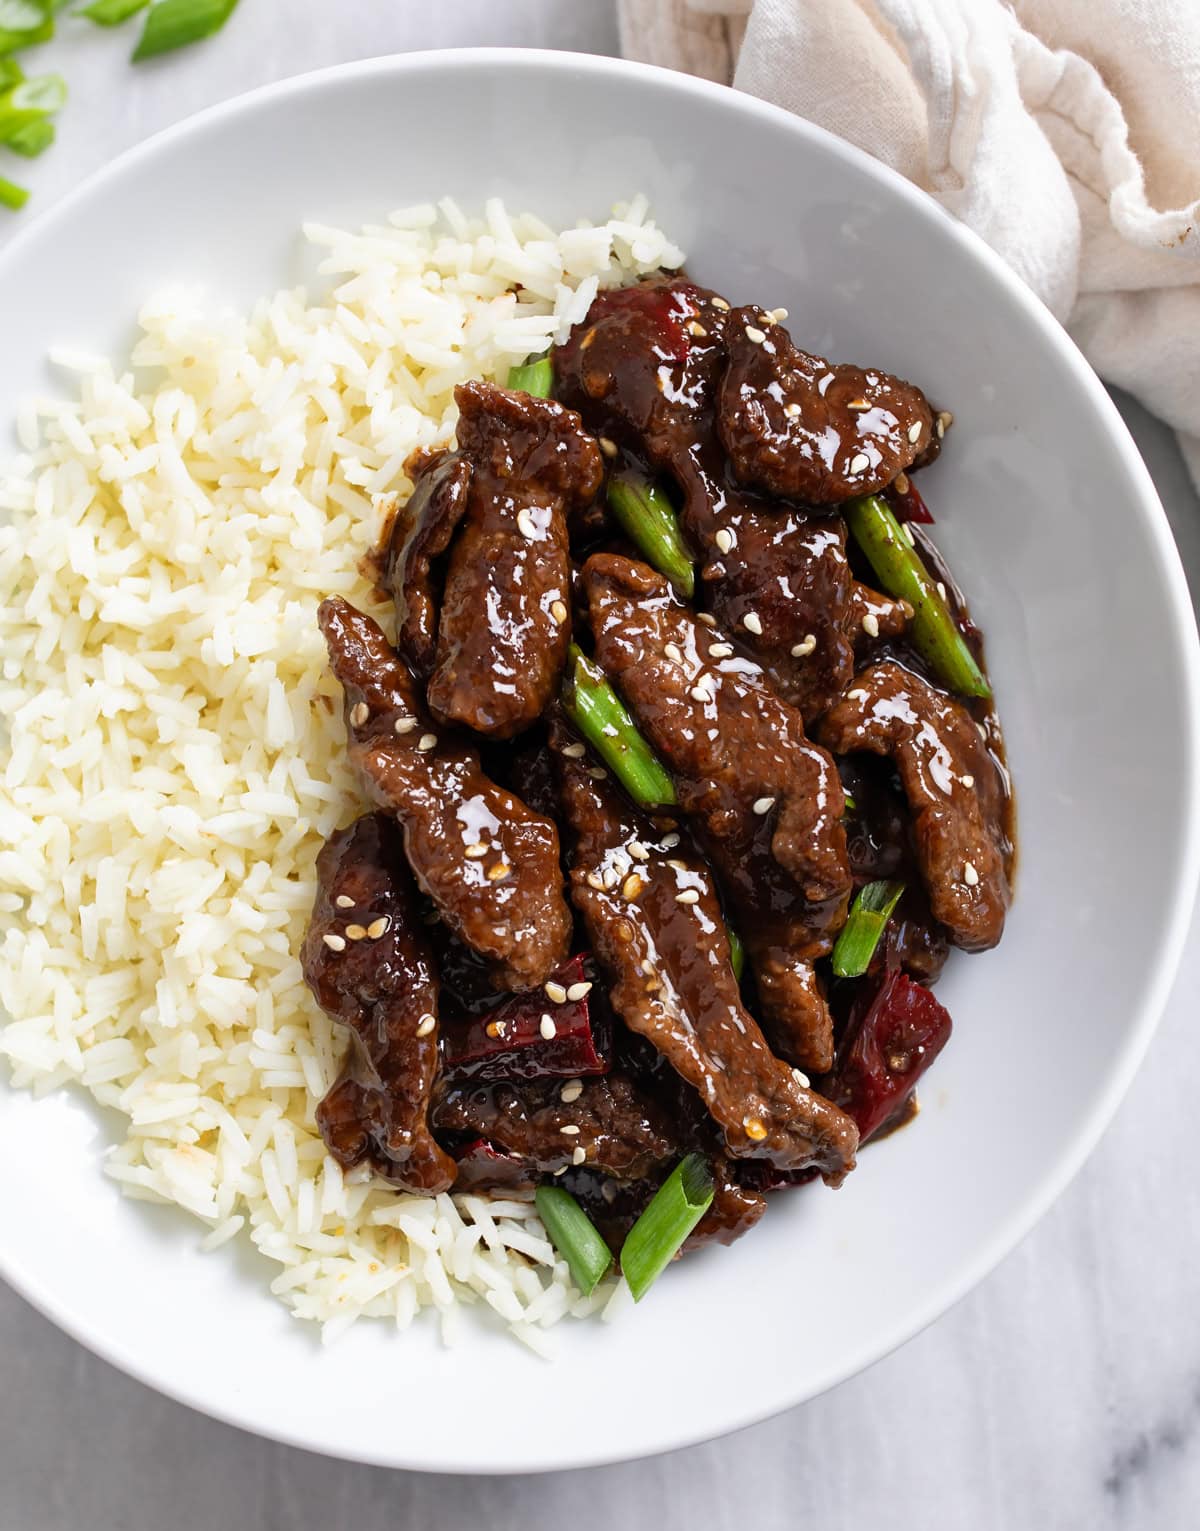
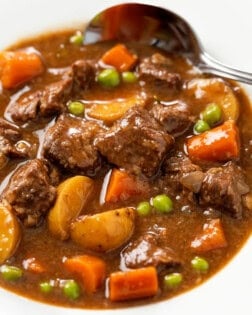
This Mongolian Beef recipe has a sweet and savory sticky sauce with tender bites of beef and dried red chilies. It tastes just like takeout and is perfect with rice!
Be sure to serve this with my Vegetable Fried Rice, and try my Hot Honey Chicken recipe next!
Mongolian Beef
I am a huge fan of making takeout recipes at home, and this Mongolian Beef really tastes like it came from a restaurant! You’ll see what I mean when you take your first bite. Your family and friends will be super impressed when you serve them this!
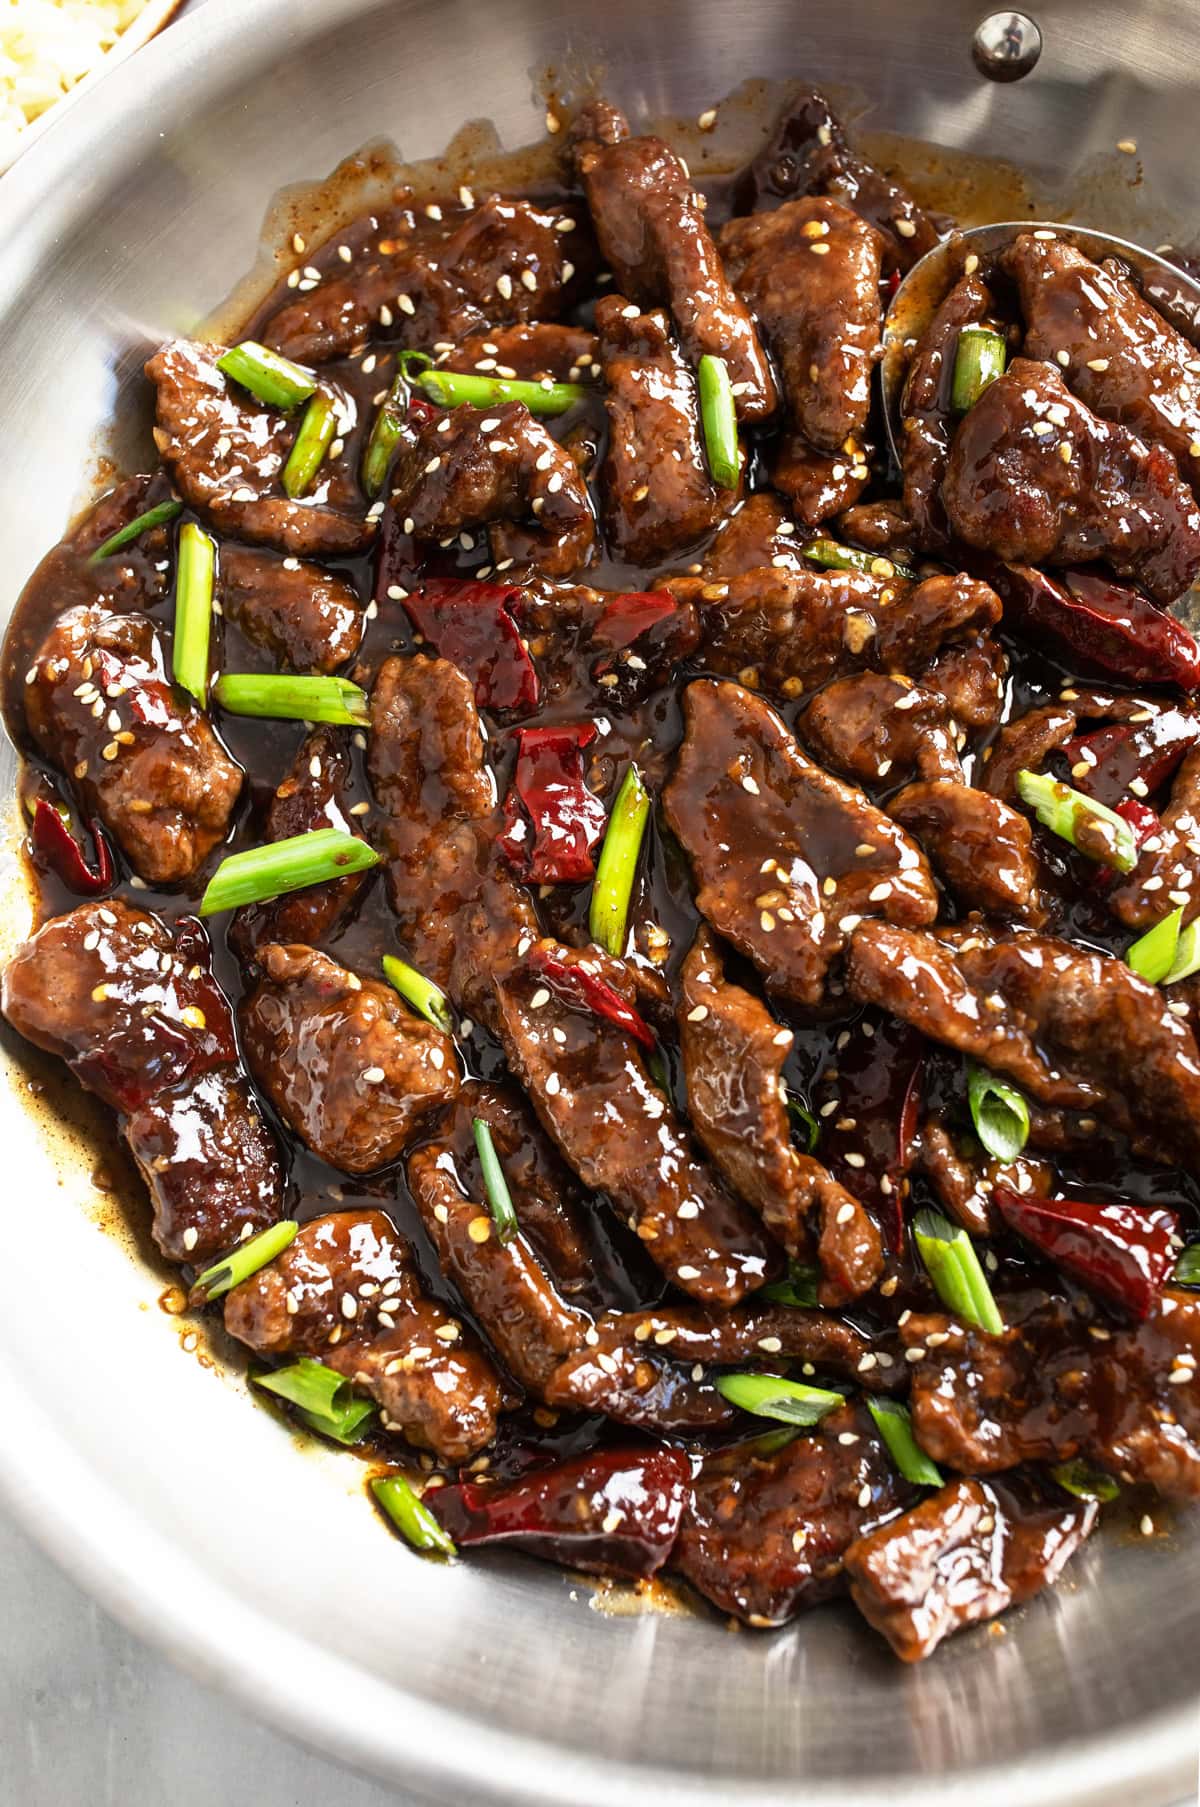
The sauce is a combination of sweet and savory, (with more savory than sweet for the perfect balance). The beef is tender, juicy, and smothered in that sticky, glossy sauce. (I’m getting hungry just thinking about it.)
Don’t miss my PRO TIPS below!
How to Make It
Note: This is an overview. See recipe card below this post for ingredient quantities and full instructions.
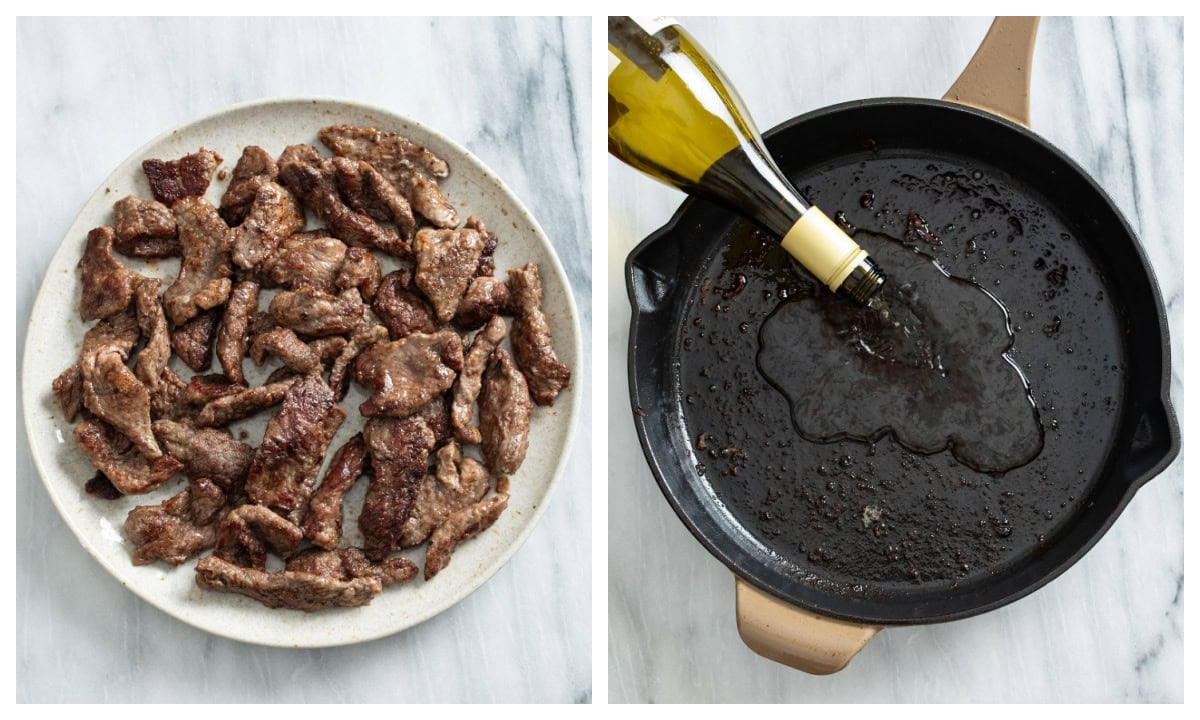
Pound each side of the beef with a meat tenderizer, then slice it into thin strips against the grain. Pat it dry and season with salt and pepper and toss with cornstarch.

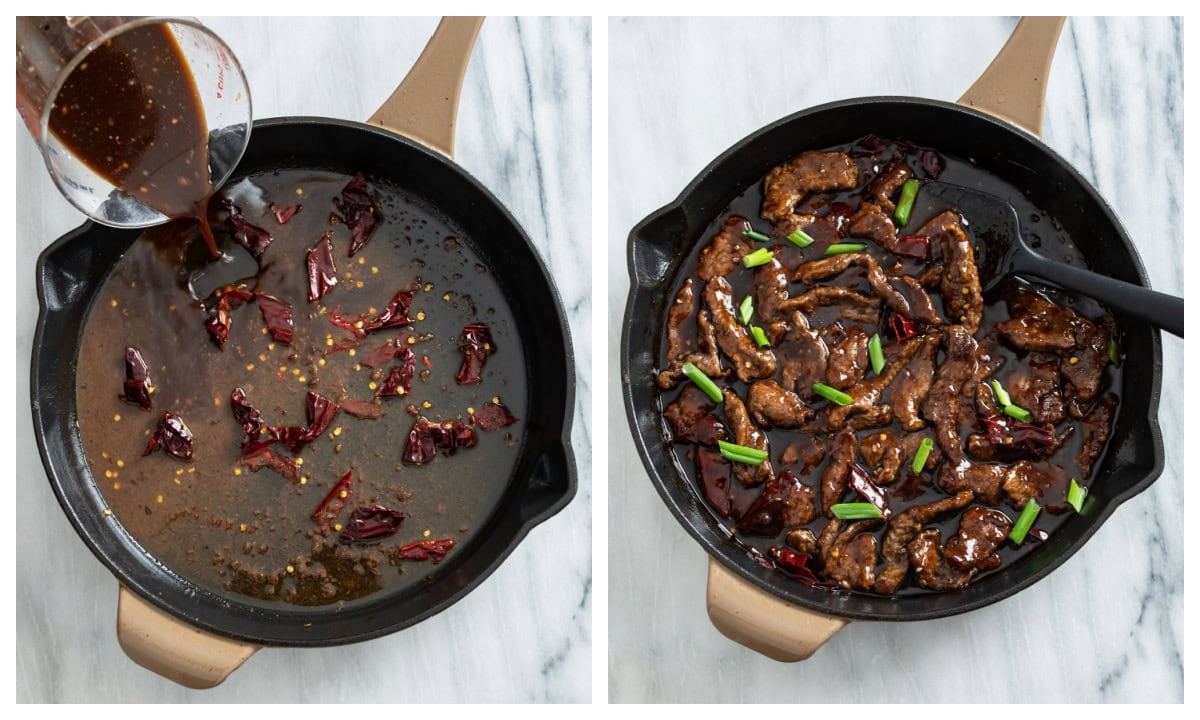
Sear in batches for 3-4 minutes, until browned and cooked through. Deglaze the skillet with wine and reduce by half. Add dry red chilies during the last 30-60 seconds (optional).
Add the sauce mixture and bring to a boil until thickened. Reduce to a simmer, add the meat and toss to coat and thicken more, 2-3 minutes. Remove from heat and garnish with green onions. Serve with rice!
Pro Tips
- Cuts of Beef: Flank steak, strip steak, skirt steak, or top sirloin are your best options for this recipe. Be sure to slice it against the grain so it’s easy to chew!
- Wine: Pinot Chardonnay, Pinot Grigio, and Sauvignon Blanc are great wine options to deglaze the pan with. An equal amount of chicken or beef broth may be used if you don’t cook with wine.
- Dried Red Chili Peppers: These are optional but are commonly found in Mongolian beef. They have varying levels of heat which should be indicated on the package. To reduce their heat, soak them in water and remove the seeds.
- To Control the Sodium in this recipe, consider using low sodium soy sauce and/or reduced sodium broth.
- Sriracha: The sriracha in this recipe doesn’t make it hot/spicy, it’s just a small amount that is used to enhance the other flavors. I use Frank’s Sriracha Sauce.
- Toasted sesame seeds can be used as a topping as well, and be sure to try my Orange Chicken next!
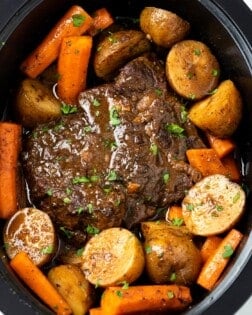
- Serve this with: White rice or my Vegetable Fried Rice!
Storage
- Store in an airtight container and refrigerate for up to 3 days or freeze for up to 3 months. Leftovers do freeze pretty well.
Tools For This Recipe
(Amazon affiliate links*)- Check out all of my kitchen essentials here.
- Meat Tenderizer– I use this almost every time I cook with beef, chicken, or pork.
- Cast Iron Skillet– I love using an enamel cast iron skillet for this recipe.
- 1 quart measuring cup with a spout– This is what I use to combine my sauce ingredients ahead of time.
- Kitchen Tongs– I use this to handle the beef while it sears.
- Measuring Spoons– I have these magnetic ones which stay nice and organized in my utensil drawer.
- 8-inch Chef’s Knife– This is the one I have, I love it.
- Cutting Boards- I love having assorted sizes. (One for the meat, one for the veggies, etc.)
*As an Amazon Associate, I earn from qualifying purchases.
Try These Next
-

- Chicken Fried Rice
-

- Beef Enchiladas
-

- Beef Ramen Noodles
-

- Egg Roll in a Bowl
-

- Chicken Broccoli Rice Casserole
-

- Steak with Gravy
Get My Free E-Book!
- I’ve got a FREE e-Book with 7 super popular dinner recipes! Click here to join my email list and I’ll send your e-Book right over!
- And be sure to follow me on Instagram, Pinterest, & Facebook!
Tried This Recipe?
Leave a review, I love hearing your feedback! ⭐⭐⭐⭐⭐

Mongolian Beef
Ingredients
Sauce
- ¾ cup beef broth
- 1/3 cup low sodium soy sauce
- 3 tablespoons brown sugar
- 2 tablespoons honey
- 1 ½ tablespoons cornstarch
- 4 cloves fresh garlic, minced
- 1 teaspoon sriracha, can sub hot sauce
- ¼ tsp ground ginger
- ¼ teaspoon sesame oil
Beef, etc.
- 1 lb. Flank steak, can also use Skirt, Sirloin, or Strip Steak. See notes.
- Salt/pepper, to taste
- ¼ cup cornstarch
- 2 tablespoons peanut oil, can sub avocado or olive oil
- ¼ cup dry white wine, see notes
- 3-4 dried red chili peppers, optional. See notes.
- 3 green onions, sliced
For Serving
- Steamed rice, see notes
Instructions
- Combine the sauce ingredients and set aside in a cool place. (Make sure the liquid isn’t warm so that it doesn’t activate the cornstarch.) Measure out the remaining ingredients before beginning.
- Place saran wrap over the beef and use a meat tenderizer to pound it on each side. This makes it much more tender. Cut away any large areas of fat if needed.
- Slice the meat (against the grain) into strips ¼-inch thick, the meat will plump up more when cooked. Pat it completely dry, sprinkle lightly with salt and pepper. Sprinkle with cornstarch and toss to coat on all sides.
- Heat the oil over medium-high heat. Sear the meat in batches for 3-4 minutes per batch, (overcrowding the pan will cause the beef to steam instead of fry). Set aside.
- Turn the heat off and add the wine, then set the heat to medium. Use a silicone spatula to “clean” the bottom and sides of the skillet, this will add more flavor to the sauce. Reduce by half, 2-3 minutes. If using dried red chilies, add them during the last 30-60 seconds.
- Stir the sauce and add it to the skillet. Bring it to a boil. Once thickened, reduce to a simmer. Add the beef back and toss to coat in the sauce for 2-3 minutes, it’ll thicken a little more. Remove from heat. Sprinkle with green onions and serve with rice!
Notes
- Cuts of Beef: Flank steak, strip steak, skirt steak, or top sirloin are your best options for this recipe. Be sure to slice it against the grain so it's easy to chew!
- Wine: Pinot Chardonnay, Pinot Grigio, and Sauvignon Blanc are great wine options to deglaze the pan with. An equal amount of chicken or beef broth may be used if you don’t cook with wine.
- Dried Red Chili Peppers: These are optional but are commonly found in Mongolian beef. They have varying levels of heat which should be indicated on the package. To reduce their heat, soak them in water and remove the seeds.
- To Control the Sodium in this recipe, consider using low sodium soy sauce and/or reduced sodium broth.
- Sriracha: The sriracha in this recipe doesn’t make it hot/spicy, it’s just a small amount that is used to enhance the other flavors. I use Frank’s Sriracha Sauce.
- Toasted sesame seeds can be used as a topping as well, and be sure to try my Orange Chicken next!
- Serve this with: White rice or my Vegetable Fried Rice!
Storage:
- Store in an airtight container and refrigerate for up to 3 days or freeze for up to 3 months.
My process for perfectly cooked rice:
- Bring 2 cups of water to a boil. (I add 2 chicken bouillon cubes to the water for enhanced flavor.)
- Add 1 cup of white long grain rice and let the liquid come back up to a boil. Cover tightly and reduce heat to a gentle simmer for 15 minutes. (I set my heat to low.)
- Remove from heat and let it stand in the pot for 10 minutes with the lid on, any rice stuck to the bottom will release.
- This yields 3 cups of flavorful, perfectly cooked rice. I use a Dutch oven for this which conducts heat well.
- Note that other varieties of rice may require different liquid measurements and/or cooking times.
Nutritional information is an estimate and is per serving. There are 4 servings in this recipe.


Another winner! I never know what to make with flank steak outside of fajitas, so I was excited to find this recipe. Very flavorful and relatively simple. Pair with some rice and maybe some broccoli for some veg and voila!
I know what you mean Wendy, flank steak can be tough to work with sometimes! I love how this one comes together and so happy you enjoyed it too!!😃 Thanks so much for the great comments!!
AWESOME! I know, this is such a great way to mix things up and I agree- pair it with rice and broccoli, and you’re in business! Thank you so much Wendy!!! ❤️❤️❤️
This is another easy and delicious recipe! Will definitely be making this recipe over and over. Your recipes are always so tasty and restaurant quality.
AHHHH thank you so much Shirl!! You definitely made my day, and I really appreciate you taking the time to leave this review, you’re the BEST! 🙂
I made this for the first time tonight and it turned out sooo delicious and it was so easy to make on a Tuesday night after work. Your recipes always impress, always taste restaurant quality and always make me feel like a really great cook. Thank you, Stephanie!
Thanks so much for your support Sarah, I’m so happy you’re enjoying the recipes!!🩷
This was very good and one I would make again. I used a little less than 2# of beef and I’m glad I did – as that meant there was more to enjoy! There was definitely enough sauce to handle the extra beef. Thank you for yet another great recipe. I loved the tips for making rice as I never heard the trick of letting it stand for 10 minutes with the cover on. No more scraping sticky rice out of the pan! I’m so glad I found your website. Thank you!
I’m so glad that you enjoyed it Jackie, and that you have been enjoying the other recipes on my site! That rice tip is a game changer isn’t it?! I remember the first time I tried it, I was beside myself when it worked! LOL. It’s like magic! Thank you for taking the time to leave a review, I really appreciate it! -Stephanie
Loved this! We regularly make your sweet sour chicken, fried rice, and just recently did the shrimp lo mein. If you ever do a honey chicken recipe, we may never get takeout again!
The sauce on this is phenomenal. 10/10 even tho I was a baby and removed the seeds on the chilis (and only did 3.) Next time I’ll probably throw in at least 2 or 3 more because I loved what they added to the dish.
Really enjoyed this with jasmine rice and some Asian style broccoli on the side. I think this is going to be a weekday staple here. Especially because it’s so quick to make!
Yummm, nice work!! I’m so happy you’re enjoying the recipes! I do have a hot honey chicken if you ever want to check it out. My husband is obsessed with it!! Thanks so much for the great comments!❤️
Made this for dinner tonight and was blown away! It is a delicious, restaurant quality meal that is so simple to make! Thank you for another family hit!
I am SOOOOO thrilled to hear that you and your family loved it Elyse!! You SO made my day, I appreciate you so much!!! Thank you!
I always enjoy looking over your recipes and in time trying them keep it coming
Thanks so much for your support Ricky! I’ll keep them coming!!💖